If you deal with SSL certificates long enough, eventually you’ll run into a trust issue or error regardless of what programming language you are using. Dealing with SSL certificates can be confusing at first, but hopefully this article can simplify a few things or at least get you past the error.
Recently, a user reported the following error when using my node-activedirectory plugin. The error was:
throw er; // Unhandled 'error' event
^
Error: CERT_UNTRUSTED
at SecurePair. (tls.js:1370:32)
at SecurePair.EventEmitter.emit (events.js:92:17)
at SecurePair.maybeInitFinished (tls.js:982:10)
at CleartextStream.read as _read
at CleartextStream.Readable.read (_stream_readable.js:320:10)
at EncryptedStream.write as _write
at doWrite (_stream_writable.js:226:10)
at writeOrBuffer (_stream_writable.js:216:5)
at EncryptedStream.Writable.write (_stream_writable.js:183:11)
at write (_stream_readable.js:583:24)
Well, what does that mean? At first you might think something is wrong with your code or perhaps a problem with the library you are using. No, that’s not the problem. The basic problem is that the SSL certificate the remote server is sending you is not “trusted” by your computer or potentially it has been tampered with (i.e. man-in-the middle attack).
What do you mean by “trusted”? I just want my connection encrypted!
The “trust” is a key part of what makes SSL work. With SSL, there are a number of certificate authorities (CA) which your computer has been preconfigured to “trust”. When someone needs an SSL certificate, they will typically send their request to a certificate authority to “sign” their certificate which creates a “chain of trust”. With SSL, if you trust a certificate, you trust that certificate and all of the certificates below it or certificates which that certificate has “signed” or verified for integrity. Although your computer was preconfigured with a bunch of trusted certificate authorities, you can add or remove from that list as needed. A certificate can also be signed by itself, this is referred to as a self-signed certificate and is common for quick testing and securing internal resources when a public key infrastructure (PKI) doesn’t exist. There is also a method for revoking bad or hacked certificates which is beyond the scope of this article; just know that this is typically referred to as a “certificate revocation list” or CRL for short.
That brief introduction was only 300,000 foot view and barely does the topic justice but should be sufficient background to understand the error. To learn even more visit the following links:
TL;DR – How Do I Fix It?
To fix the problem, you typically have three options:
- Don’t use SSL for the connection. But that’s probably not a good idea…
- Disable certification trust verification in your application framework. Another bad idea since it makes a man-in-the middle attack possible. But sometimes for quick testing and proof of concept this is acceptable. But NEVER do this in production!!!
- Verify, import and trust the certificate authority or individual certificate.
Of those options, let’s do it the right way and get our trust properly established.
Getting the certificate
The first step is getting the public certificate (or preferably the certificate authority for that certificate) that you want to trust. You don’t need the private key that goes with that certificate and no admin that knew what they were doing would give it to you anyway. There are a number of different ways to get this information depending on what type of access you have to the server that contains the SSL certificate.
Access To The Server
If you have direct access to the server, you can export the certificate to a file. To get started, follow these steps:
Export Certificate via Microsoft Management Console (mmc).
- On the server that has the certificate you want to export, start the Microsoft Management Console. Press Windows-R on your keyboard to bring up the “Run…” command line. Then enter ‘mmc’ and press enter.
- File -> Add/Remove snap in…
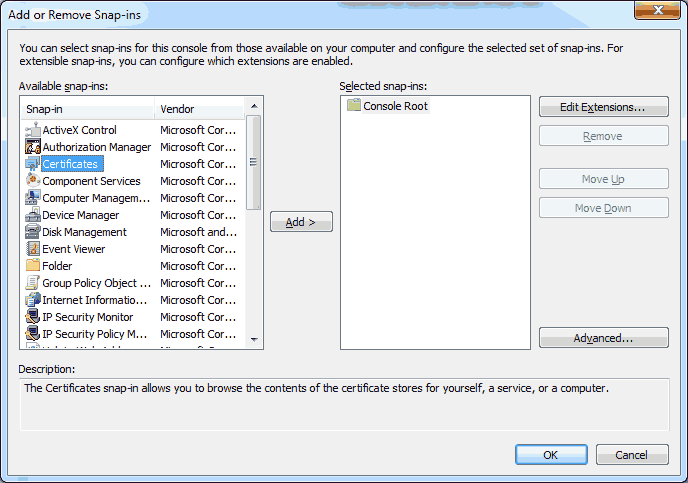 Choose ‘Certificate’ from the list and click on the ‘Add >’ button.
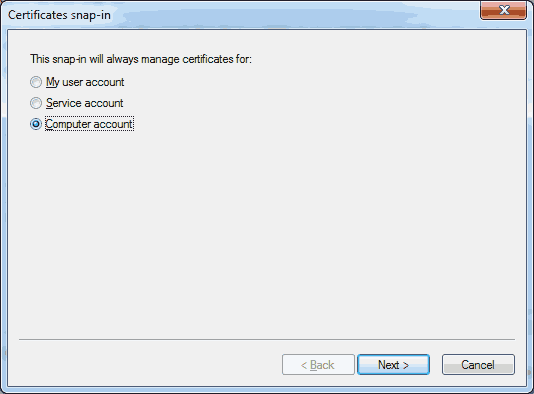 Choose ‘Computer Account’ and click on ‘Next >’.
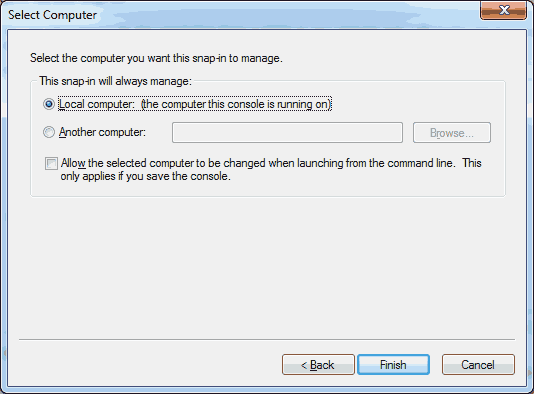 Choose ‘Local computer: (the computer this console is running on)’. Click on ‘Finish’.
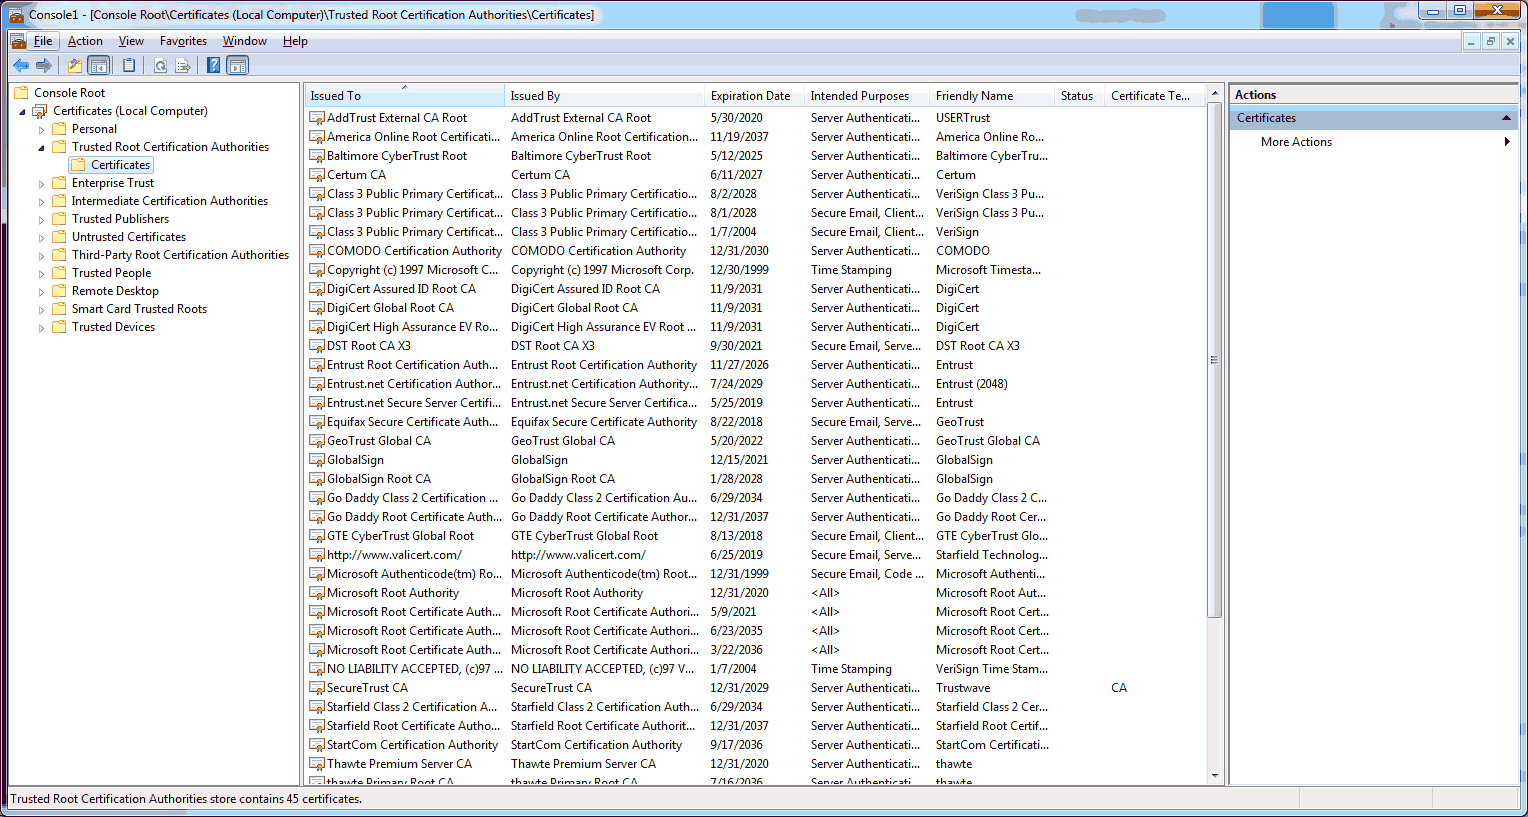
- Find the certificate in the list that you want to export. Most likely located in the ‘Personal > Certificates’ or ‘Trusted Root Certification Authorities > Certificates’ locations. Right click on the certificate you want to export, then choose ‘All Tasks’ -> ‘Export…’.
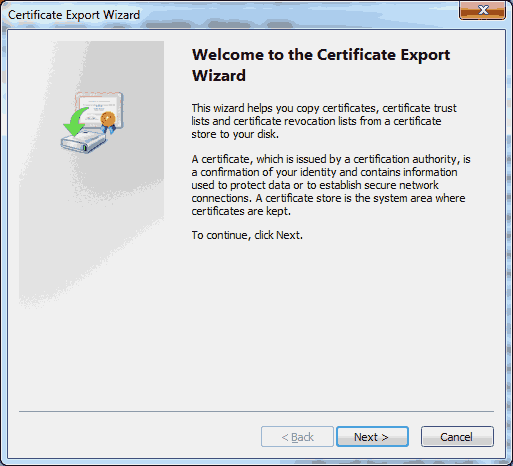 This starts the Certificate Export Wizard. Click ‘Next >’.
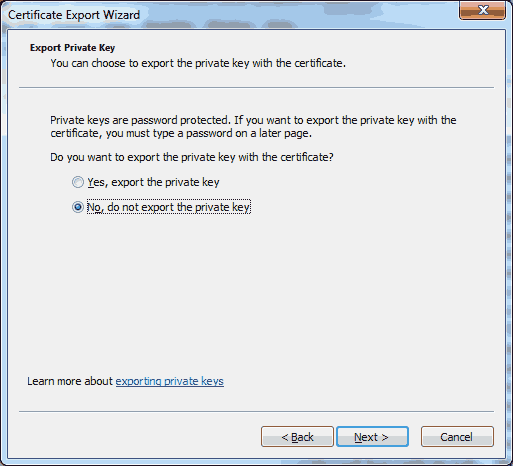 If the certificate you have also had a corresponding private key, choose ‘No, do not export the private key’. As discussed previously, you do NOT want to export the private key or give it to anyone else. Click on ‘Next >’.
 Choose ‘Base-64 encoded X.509 (.CER)’ and click on ‘Next >’. Note: You could choose any of the other formats, depending on where you will be using the certificate. I personally find the Base-64 encoded certificate to be more compatible across platforms.
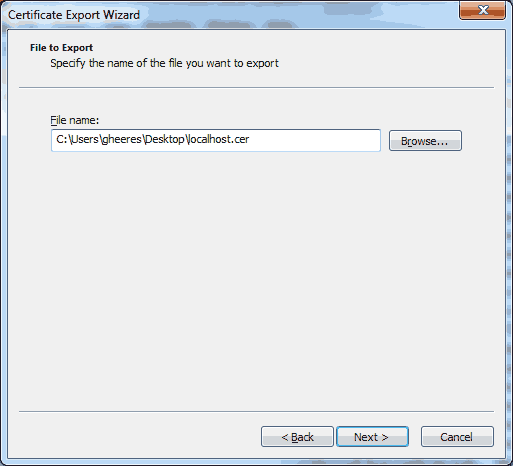 Choose a location and filename to save the file to. Make sure it ends with either ‘*.cer’ or ‘*.crt’ so that the Windows operating system will recognize the type of file. Click on ‘Next >’.
 Click on ‘Next >’.
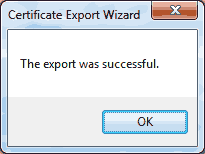 You should receive a confirmation that the certificate was exported successfully. Click on ‘OK’.
No Access to the server
If you don’t have direct access to the server, you can still get the public certificate that is presented to you. If you’re trying to get a certificate for an HTTP/HTTPS server, you can easily view the certificate and save it to file. However, if you’re trying to get the SSL certificate from LDAPS or perhaps IMAPS, we’ll need to use the OpenSSL utilities to view the certificates. OpenSSL isn’t installed by default on Windows machines, however if you have access to a Linux server, typically the openssl tools will be available. For Windows, we can download the OpenSSL binaries or use Cygwin to install GNU / POSIX compatible binaries.
OpenSSL Tools
Once you have the openssl binaries available, we can use the following command to view the SSL certificates for any type of connection. The following example would view the certificates for an LDAPS (LDAP via SSL) connection on the default port. Please note that Active Directory and LDAP are basically the same. Active Directory is Microsoft’s implementation of LDAP.
openssl s_client -showcerts -host remoteserver.domain.name -port 636
Running that command, you should see something similar to the following:
CONNECTED(00000003)
---
Certificate chain
 0 s:/C=US/ST=California/L=Mountain View/O=Google Inc/CN=www.google.com
   i:/C=US/O=Google Inc/CN=Google Internet Authority G2
-----BEGIN CERTIFICATE-----
MIIEdjCCA16gAwIBAgIICNMg30SopiMwDQYJKoZIhvcNAQEFBQAwSTELMAkGA1UE
BhMCVVMxEzARBgNVBAoTCkdvb2dsZSBJbmMxJTAjBgNVBAMTHEdvb2dsZSBJbnRl
cm5ldCBBdXRob3JpdHkgRzIwHhcNMTQwNTIyMTEyNTU4WhcNMTQwODIwMDAwMDAw
WjBoMQswCQYDVQQGEwJVUzETMBEGA1UECAwKQ2FsaWZvcm5pYTEWMBQGA1UEBwwN
TW91bnRhaW4gVmlldzETMBEGA1UECgwKR29vZ2xlIEluYzEXMBUGA1UEAwwOd3d3
Lmdvb2dsZS5jb20wggEiMA0GCSqGSIb3DQEBAQUAA4IBDwAwggEKAoIBAQCNJSwk
PPpMgw/J/diF5cAqGbmNe/Bih1rLVsfBwJDS3zunxMI1IAhoudccuQd0h4OWYcGc
z1Y8aNvpPz+3qY0GUvQcVGLh8JydQJI8eBlXL9v8J/uK2GBT/37Bkcga94DqpOLG
9n5Fvsd6F87+jpuCyDXW1hv6aNr4uiyFwa7I3HlTSr6BauM+aS0PXUTJSBi0BG73
gJbpTB/MgFlILp3x5bYSpn+3eSdME4EKEq42uy/oVHFrXsgZA6/lmWMiM/Is530x
FJfu0Bz7OgPRYsAiGiGjhPyPUs4oTOQERq2j9cIM4OXHVtZqehESE6noDvlNhptA
R+6lpPoDgQp2O5BjAgMBAAGjggFBMIIBPTAdBgNVHSUEFjAUBggrBgEFBQcDAQYI
KwYBBQUHAwIwGQYDVR0RBBIwEIIOd3d3Lmdvb2dsZS5jb20waAYIKwYBBQUHAQEE
XDBaMCsGCCsGAQUFBzAChh9odHRwOi8vcGtpLmdvb2dsZS5jb20vR0lBRzIuY3J0
MCsGCCsGAQUFBzABhh9odHRwOi8vY2xpZW50czEuZ29vZ2xlLmNvbS9vY3NwMB0G
A1UdDgQWBBQAC/6CV31piwAaimR5f1OK/QdilTAMBgNVHRMBAf8EAjAAMB8GA1Ud
IwQYMBaAFErdBhYbvPZotXb1gba7Yhq6WoEvMBcGA1UdIAQQMA4wDAYKKwYBBAHW
eQIFATAwBgNVHR8EKTAnMCWgI6Ahhh9odHRwOi8vcGtpLmdvb2dsZS5jb20vR0lB
RzIuY3JsMA0GCSqGSIb3DQEBBQUAA4IBAQB3JODw4UTUX3xJyr55rbd5EIeMQjcs
sKRvH/oJmEcIl1hrOaiNnpEbQis+2N5YR2PMMU825iO30L66hIswPOxfFiBeb1ZM
TWPJG5WXx7fctFPDXbJ3Zjq3cANIaX8Vlu4nSayNEhKnNuZog1YVSrg3Mu3E+8Ln
bzt+pZa9iTH821hu/il3TmRzXndT3dEz+n1XkrT3F9NBL3ZyYceDU5uB9fo7x25H
pLP/8pxIqu3+AcoGqNmJpxSfWlaqKXqd3TZ++edHtgTO5t8KV65GgCQ9+Wl0amtG
odT0vGI0eRPRl6s+Nnk6Aguz4bkRPsYTuEVJdEd3F+f9kxHrVWI0c+J4
-----END CERTIFICATE-----
 1 s:/C=US/O=Google Inc/CN=Google Internet Authority G2
   i:/C=US/O=GeoTrust Inc./CN=GeoTrust Global CA
-----BEGIN CERTIFICATE-----
MIIEBDCCAuygAwIBAgIDAjppMA0GCSqGSIb3DQEBBQUAMEIxCzAJBgNVBAYTAlVT
MRYwFAYDVQQKEw1HZW9UcnVzdCBJbmMuMRswGQYDVQQDExJHZW9UcnVzdCBHbG9i
YWwgQ0EwHhcNMTMwNDA1MTUxNTU1WhcNMTUwNDA0MTUxNTU1WjBJMQswCQYDVQQG
EwJVUzETMBEGA1UEChMKR29vZ2xlIEluYzElMCMGA1UEAxMcR29vZ2xlIEludGVy
bmV0IEF1dGhvcml0eSBHMjCCASIwDQYJKoZIhvcNAQEBBQADggEPADCCAQoCggEB
AJwqBHdc2FCROgajguDYUEi8iT/xGXAaiEZ+4I/F8YnOIe5a/mENtzJEiaB0C1NP
VaTOgmKV7utZX8bhBYASxF6UP7xbSDj0U/ck5vuR6RXEz/RTDfRK/J9U3n2+oGtv
h8DQUB8oMANA2ghzUWx//zo8pzcGjr1LEQTrfSTe5vn8MXH7lNVg8y5Kr0LSy+rE
ahqyzFPdFUuLH8gZYR/Nnag+YyuENWllhMgZxUYi+FOVvuOAShDGKuy6lyARxzmZ
EASg8GF6lSWMTlJ14rbtCMoU/M4iarNOz0YDl5cDfsCx3nuvRTPPuj5xt970JSXC
DTWJnZ37DhF5iR43xa+OcmkCAwEAAaOB+zCB+DAfBgNVHSMEGDAWgBTAephojYn7
qwVkDBF9qn1luMrMTjAdBgNVHQ4EFgQUSt0GFhu89mi1dvWBtrtiGrpagS8wEgYD
VR0TAQH/BAgwBgEB/wIBADAOBgNVHQ8BAf8EBAMCAQYwOgYDVR0fBDMwMTAvoC2g
K4YpaHR0cDovL2NybC5nZW90cnVzdC5jb20vY3Jscy9ndGdsb2JhbC5jcmwwPQYI
KwYBBQUHAQEEMTAvMC0GCCsGAQUFBzABhiFodHRwOi8vZ3RnbG9iYWwtb2NzcC5n
ZW90cnVzdC5jb20wFwYDVR0gBBAwDjAMBgorBgEEAdZ5AgUBMA0GCSqGSIb3DQEB
BQUAA4IBAQA21waAESetKhSbOHezI6B1WLuxfoNCunLaHtiONgaX4PCVOzf9G0JY
/iLIa704XtE7JW4S615ndkZAkNoUyHgN7ZVm2o6Gb4ChulYylYbc3GrKBIxbf/a/
zG+FA1jDaFETzf3I93k9mTXwVqO94FntT0QJo544evZG0R0SnU++0ED8Vf4GXjza
HFa9llF7b1cq26KqltyMdMKVvvBulRP/F/A8rLIQjcxz++iPAsbw+zOzlTvjwsto
WHPbqCRiOwY1nQ2pM714A5AuTHhdUDqB1O6gyHA43LL5Z/qHQF1hwFGPa4NrzQU6
yuGnBXj8ytqU0CwIPX4WecigUCAkVDNx
-----END CERTIFICATE-----
 2 s:/C=US/O=GeoTrust Inc./CN=GeoTrust Global CA
   i:/C=US/O=Equifax/OU=Equifax Secure Certificate Authority
-----BEGIN CERTIFICATE-----
MIIDfTCCAuagAwIBAgIDErvmMA0GCSqGSIb3DQEBBQUAME4xCzAJBgNVBAYTAlVT
MRAwDgYDVQQKEwdFcXVpZmF4MS0wKwYDVQQLEyRFcXVpZmF4IFNlY3VyZSBDZXJ0
aWZpY2F0ZSBBdXRob3JpdHkwHhcNMDIwNTIxMDQwMDAwWhcNMTgwODIxMDQwMDAw
WjBCMQswCQYDVQQGEwJVUzEWMBQGA1UEChMNR2VvVHJ1c3QgSW5jLjEbMBkGA1UE
AxMSR2VvVHJ1c3QgR2xvYmFsIENBMIIBIjANBgkqhkiG9w0BAQEFAAOCAQ8AMIIB
CgKCAQEA2swYYzD99BcjGlZ+W988bDjkcbd4kdS8odhM+KhDtgPpTSEHCIjaWC9m
OSm9BXiLnTjoBbdqfnGk5sRgprDvgOSJKA+eJdbtg/OtppHHmMlCGDUUna2YRpIu
T8rxh0PBFpVXLVDviS2Aelet8u5fa9IAjbkU+BQVNdnARqN7csiRv8lVK83Qlz6c
JmTM386DGXHKTubU1XupGc1V3sjs0l44U+VcT4wt/lAjNvxm5suOpDkZALeVAjmR
Cw7+OC7RHQWa9k0+bw8HHa8sHo9gOeL6NlMTOdReJivbPagUvTLrGAMoUgRx5asz
PeE4uwc2hGKceeoWMPRfwCvocWvk+QIDAQABo4HwMIHtMB8GA1UdIwQYMBaAFEjm
aPkr0rKV10fYIyAQTzOYkJ/UMB0GA1UdDgQWBBTAephojYn7qwVkDBF9qn1luMrM
TjAPBgNVHRMBAf8EBTADAQH/MA4GA1UdDwEB/wQEAwIBBjA6BgNVHR8EMzAxMC+g
LaArhilodHRwOi8vY3JsLmdlb3RydXN0LmNvbS9jcmxzL3NlY3VyZWNhLmNybDBO
BgNVHSAERzBFMEMGBFUdIAAwOzA5BggrBgEFBQcCARYtaHR0cHM6Ly93d3cuZ2Vv
dHJ1c3QuY29tL3Jlc291cmNlcy9yZXBvc2l0b3J5MA0GCSqGSIb3DQEBBQUAA4GB
AHbhEm5OSxYShjAGsoEIz/AIx8dxfmbuwu3UOx//8PDITtZDOLC5MH0Y0FWDomrL
NhGc6Ehmo21/uBPUR/6LWlxz/K7ZGzIZOKuXNBSqltLroxwUCEm2u+WR74M26x1W
b8ravHNjkOR/ez4iyz0H7V84dJzjA1BOoa+Y7mHyhD8S
-----END CERTIFICATE-----
---
Server certificate
subject=/C=US/ST=California/L=Mountain View/O=Google Inc/CN=www.google.com
issuer=/C=US/O=Google Inc/CN=Google Internet Authority G2
---
No client certificate CA names sent
---
SSL handshake has read 3231 bytes and written 432 bytes
---
New, TLSv1/SSLv3, Cipher is RC4-SHA
Server public key is 2048 bit
Compression: NONE
Expansion: NONE
SSL-Session:
    Protocol  : TLSv1
    Cipher    : RC4-SHA
    Session-ID: D915A1902D9384B5E11F80BF76037C61048F24C763802E9C5CE9F56684F713B2
    Session-ID-ctx:
    Master-Key: DB66D3BC903435A25D3C436D39E4ED2E513731ED7DF3F6BB6AA8C7245ED70433B61546CB0BA3F1465D8B87A978CB5715
    Key-Arg   : None
    Start Time: 1401542147
    Timeout   : 300 (sec)
    Verify return code: 20 (unable to get local issuer certificate)
---
Note: This example was run against a pubic Google WWW / HTTPS server.
In the example output above, we see a full certificate authority chain. Typically when working with SSL, you want to trust the certificate authority that signed the actual certificate. You could trust each certificate individually, however this doesn’t scale beyond a handful of servers.Each BEGIN CERTIFICATE and END CERTIFICATE block contains the base-64 encoded version of that SSL certificate. Once you find the certificate you want, copy the BEGIN / END block inclusively and save to a file with a *.crt or *.cer extension.
-----BEGIN CERTIFICATE-----
MIIEBDCCAuygAwIBAgIDAjppMA0GCSqGSIb3DQEBBQUAMEIxCzAJBgNVBAYTAlVT
MRYwFAYDVQQKEw1HZW9UcnVzdCBJbmMuMRswGQYDVQQDExJHZW9UcnVzdCBHbG9i
YWwgQ0EwHhcNMTMwNDA1MTUxNTU1WhcNMTUwNDA0MTUxNTU1WjBJMQswCQYDVQQG
EwJVUzETMBEGA1UEChMKR29vZ2xlIEluYzElMCMGA1UEAxMcR29vZ2xlIEludGVy
bmV0IEF1dGhvcml0eSBHMjCCASIwDQYJKoZIhvcNAQEBBQADggEPADCCAQoCggEB
AJwqBHdc2FCROgajguDYUEi8iT/xGXAaiEZ+4I/F8YnOIe5a/mENtzJEiaB0C1NP
VaTOgmKV7utZX8bhBYASxF6UP7xbSDj0U/ck5vuR6RXEz/RTDfRK/J9U3n2+oGtv
h8DQUB8oMANA2ghzUWx//zo8pzcGjr1LEQTrfSTe5vn8MXH7lNVg8y5Kr0LSy+rE
ahqyzFPdFUuLH8gZYR/Nnag+YyuENWllhMgZxUYi+FOVvuOAShDGKuy6lyARxzmZ
EASg8GF6lSWMTlJ14rbtCMoU/M4iarNOz0YDl5cDfsCx3nuvRTPPuj5xt970JSXC
DTWJnZ37DhF5iR43xa+OcmkCAwEAAaOB+zCB+DAfBgNVHSMEGDAWgBTAephojYn7
qwVkDBF9qn1luMrMTjAdBgNVHQ4EFgQUSt0GFhu89mi1dvWBtrtiGrpagS8wEgYD
VR0TAQH/BAgwBgEB/wIBADAOBgNVHQ8BAf8EBAMCAQYwOgYDVR0fBDMwMTAvoC2g
K4YpaHR0cDovL2NybC5nZW90cnVzdC5jb20vY3Jscy9ndGdsb2JhbC5jcmwwPQYI
KwYBBQUHAQEEMTAvMC0GCCsGAQUFBzABhiFodHRwOi8vZ3RnbG9iYWwtb2NzcC5n
ZW90cnVzdC5jb20wFwYDVR0gBBAwDjAMBgorBgEEAdZ5AgUBMA0GCSqGSIb3DQEB
BQUAA4IBAQA21waAESetKhSbOHezI6B1WLuxfoNCunLaHtiONgaX4PCVOzf9G0JY
/iLIa704XtE7JW4S615ndkZAkNoUyHgN7ZVm2o6Gb4ChulYylYbc3GrKBIxbf/a/
zG+FA1jDaFETzf3I93k9mTXwVqO94FntT0QJo544evZG0R0SnU++0ED8Vf4GXjza
HFa9llF7b1cq26KqltyMdMKVvvBulRP/F/A8rLIQjcxz++iPAsbw+zOzlTvjwsto
WHPbqCRiOwY1nQ2pM714A5AuTHhdUDqB1O6gyHA43LL5Z/qHQF1hwFGPa4NrzQU6
yuGnBXj8ytqU0CwIPX4WecigUCAkVDNx
-----END CERTIFICATE-----
You now have the public certificate of the remote server or certificate authority. Our next step will be to import that certificate into our Trusted Root Certificate Authorities.
Trusting / Importing a Certificate
Once you have your certificate, we can go ahead and import that certificate and trust it. Follow these steps:
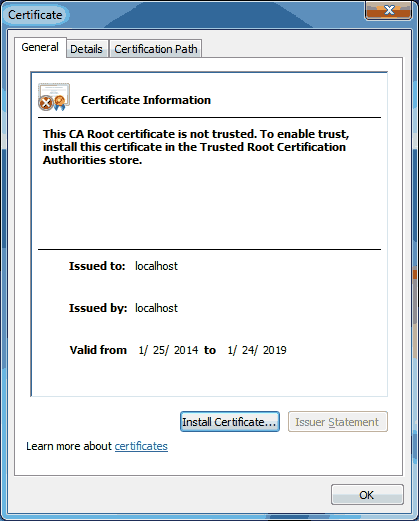 In Windows, double click or open the certificate that you extracted earlier. Click on the ‘Install Certificate…’ button.
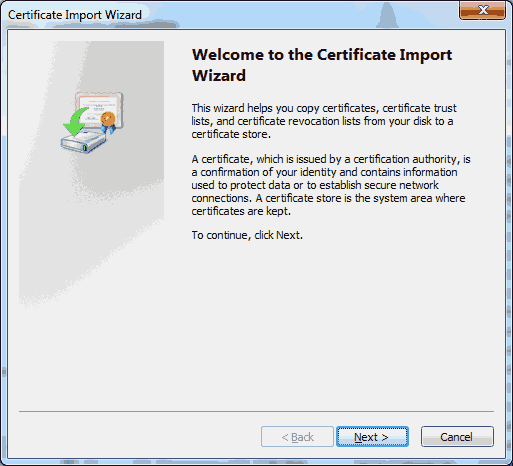 In the Certificate Import Wizard, click on ‘Next >’.
 Choose ‘Place all certificates in the following store’. Then click on the ‘Browse…’ button.
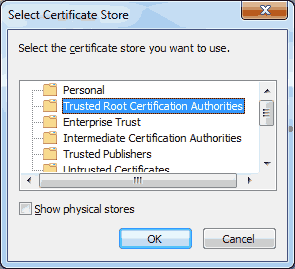 Click on the ‘Trusted Root Certificate Authorities’ and then click on the ‘OK’ button.
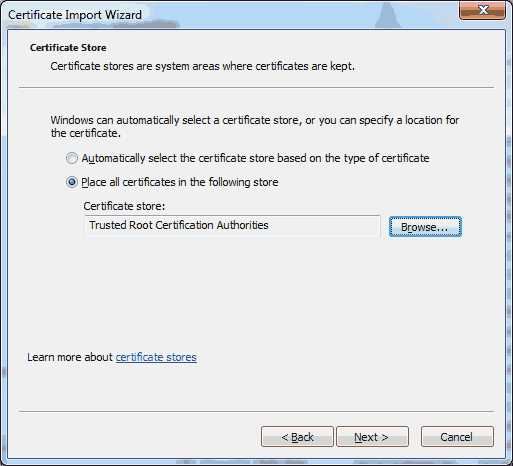 Click on ‘Next >’.
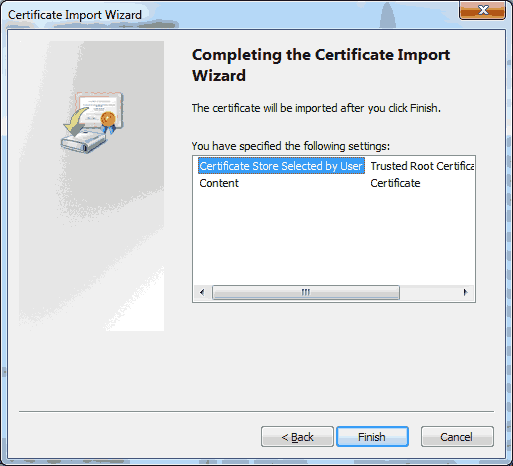 Click on ‘Finish’.
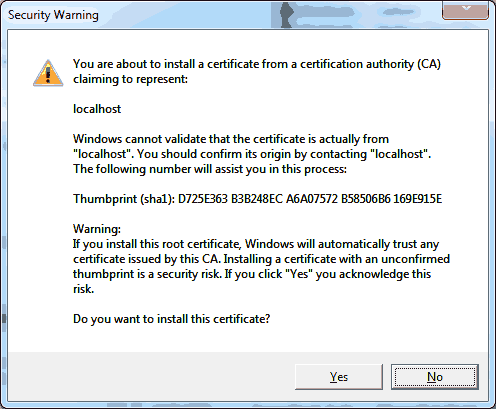 Depending on the certificate, you may receive the following warning. Basically this is warning you to make sure that you have the right certificate. Click on ‘Yes’ to continue.
 Click on ‘OK’.
The certificate should now be installed and trusted on your local computer.
Note, the above steps would import the certificate for your account. To add it for the computer (and all users), you would need to use the Microsoft Management Console (MMC). And use the ‘All Tasks -> Import…’ option.
Hopefully this has helped. Please note, that if you’re using a Java application or doing application development with Java, it’s trusted keystore information is stored separately from the operating system and is managed through the ‘keytool’ utility. We’ll save that topic for another day…