When setting up web applications, typically we want to use SSL by default. Instead of writing custom application code to redirect, we can configure IIS to automatically do the redirection for us.
Installing Url Rewrite
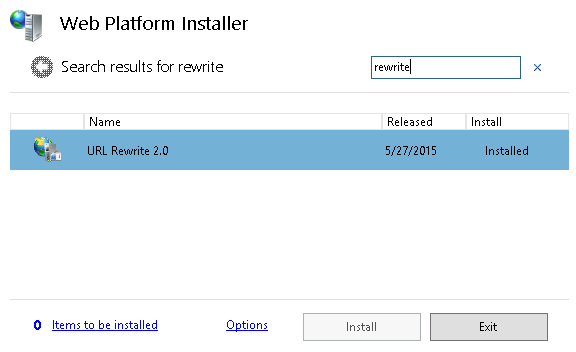 To get started, the first thing you need to do is to use the Web Platform Installer to install the Url Rewrite module. Simply do a search for “rewrite” and then click on Install.
Once installed, you should have a new option available for the machine as well as the site and each application. Setting defined in Url Rewrite can be overridden successively where an application web.config will override the site web.config which will override the server web.config.
Rule To Redirect HTTP to HTTPS
Creating a rewrite for SSL is pretty simple. With the URL Rewrite applet open, follow these steps:
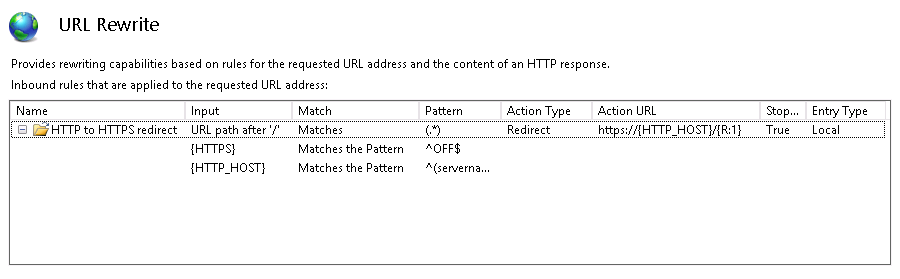
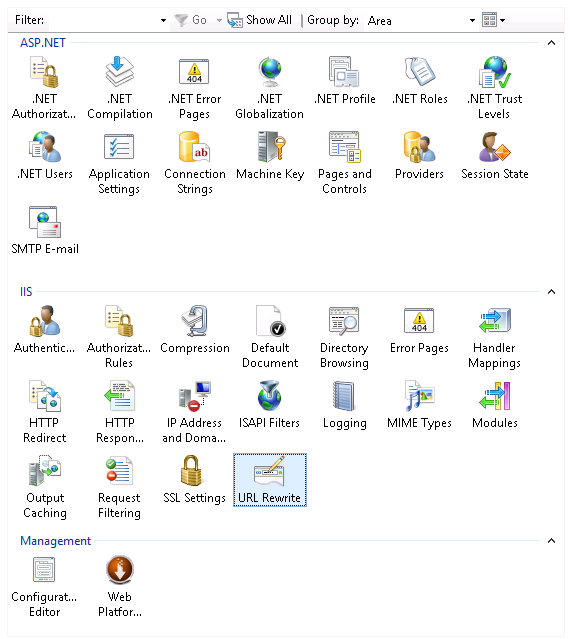 Open the “URL Rewrite” applet by double clicking on it.
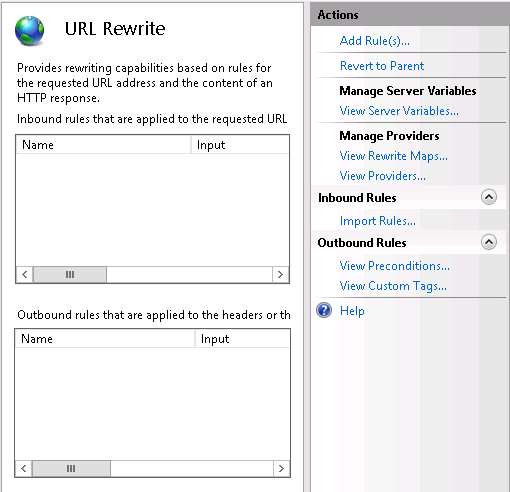 Click on the “Add Rule(s)…” action at the right.
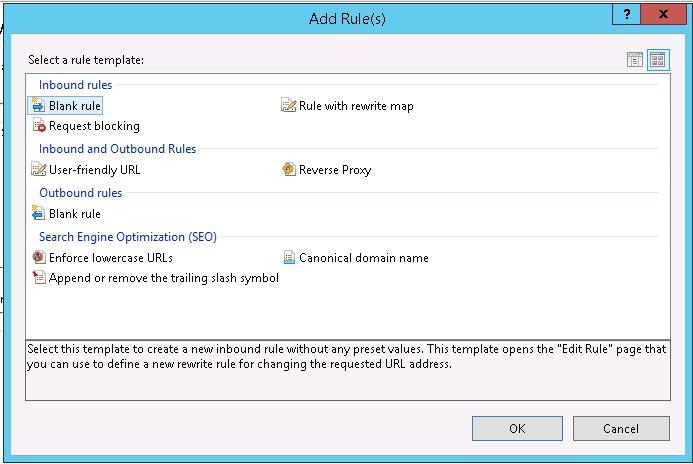 Choose “Blank rule” from the “Inbound rules” and click on the OK button.
- Give the rule a name. In this case, let’s call it HTTP to HTTPS redirect
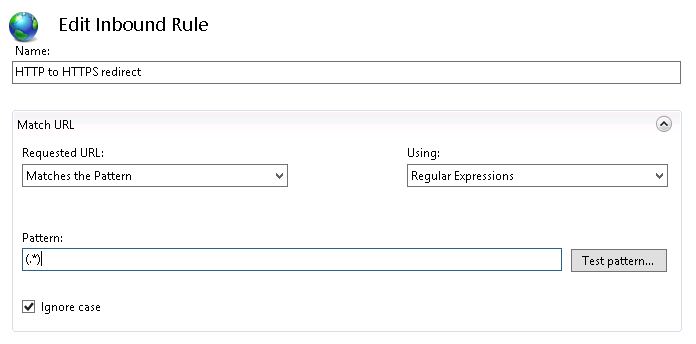 Set the regular expression pattern of the url you want to match or apply this filter to.
Typically you can use (.*) which means to match everything.
Use the “Test pattern…” to ensure that your regular expression is working correctly. Be careful with trailing slash matches.
- Scroll down and expand the conditions grouping and click on the “Add…” button. We’re going to be adding two conditions.
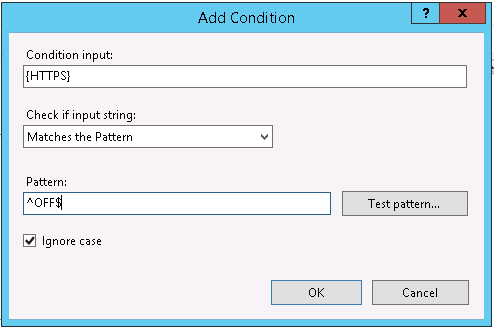 Add a match for the HTTPS environment variable checking for the value of OFF.
- Condition Input:
- {HTTPS}
- Pattern:
- ^OFF$
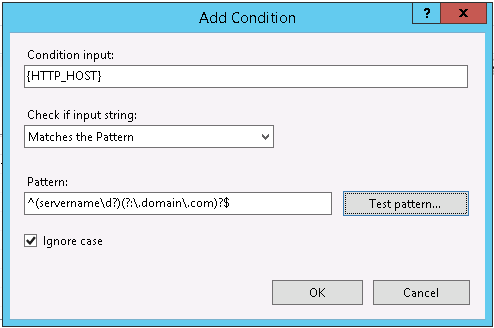 Lastly we’ll add a match for the server name stored in the HTTP_HOST environment variable. You can omit this if you only have one site configured for your IIS installation.
- Condition Input:
- {HTTP_HOST}
- Pattern:
- ^(servername\d?)(?:\.domain\.com)?$
Tip:Assuming you append a number to the end of a server name for each web server in the farm or cluster (i.e. servername1.domain.com, servername2.domain.com, etc.), the previous regular expression will match all of server names with a single digit, including servername.domain.com since the “?” match will match on 0 or 1 numbers.
Adjust the regular expression as necessary for your environment. Make sure to use the “Test Pattern…” button to ensure you have your regular expression correct.
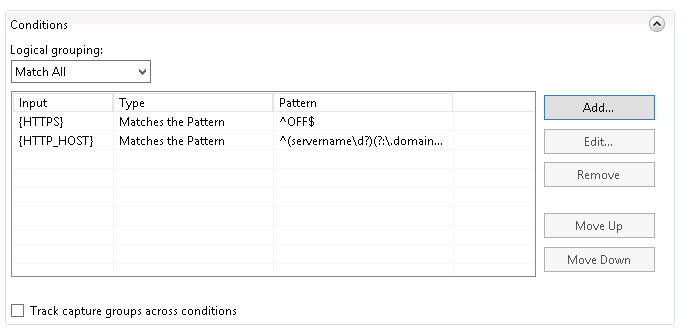 When you’re done, you should have two conditions set to Match All.
 Scroll down to the action grouping. Set the following values:
- Action type:
- Redirect
- Redirect URL:
- https://{HTTP_HOST}/{R:1}
- Append query string:
- checked
- Redirect type:
- Permanent (301)
 To finish, click on the Apply button in the Actions pain at the right.
How It Works
The Url Rewrite applet works by adding configuration sections to the web.config file for the specified location. Instead of using the URL Rewrite, you can manually edit or add the necessary settings with careful XML editing. To do so, add a System.webServer section, if it doesn’t already exist, to your web.config. Then inside of the System.webServer XML element add the rewrite element to the existing element.
<?xml version="1.0" encoding="utf-8"?>
<configuration>
  <system.webServer>
    <rewrite>
      <rules>
        <clear />
        <rule name="HTTP to HTTPS redirect" enabled="true" stopProcessing="true">
          <match url="(.*)" />
          <conditions>
            <add input="{HTTPS}" pattern="^OFF$" />
            <add input="{HTTP_HOST}" pattern="^(servername\d?)(?:\.domain\.com)?$" />
          </conditions>
          <action type="Redirect" url="https://{HTTP_HOST}/{R:1}" />
        </rule>
      </rules>
    </rewrite>
  </system.webServer>
</configuration>
Note: If you manage an on-premise Team Foundation Server (TFS) server, I encourage you to do this by default to avoid your developers accidentally sending their credentials or confidential information in the clear of the network. Please note that each time you apply and update or upgrade to TFS, you’ll need to reapply the settings in the default web.config file. You can find this file at: C:\Program Files\Microsoft Team Foundation Server 14.0\Application Tier\Web Services\web.config