For my employer, I’ve been working on setting up a continuous integration and release pipeline using Team Foundation Server (TFS) on-premise. Earlier this year, I had started experimenting with the standalone Release Management 2015 tool. Although I made some progress, the XAML based workflows and client tooling left a lot to be desired and I ended up reverting to using msbuild deployment options directly from the build itself. Not ideal, but better than nothing.

I was ecstatic to learn that a web-based version of Release Management had been integrated into Visual Studio Team Services (VSTS), formerly Visual Studio Online, as part of a preview release. But much to my dismay, the new Release Management (in preview), wasn’t scheduled to be available for on-premise TFS until later in 2016. VSTS typically get’s new updates every three weeks, with those updates rolled to TFS on-premise on a quarterly cycle. It was clear that the Release Management 2015 client and server tool were going away so it didn’t pay time to continue exploring the solution.

An Early Birthday Present!

After resigning myself to the fact that I’d have to wait to get my hands on the new Release Management tools, the release candidate for TFS 2015 Update 2 was announced. Much to my surprise and excitement TFS 2015 Update 2 RC1 included the new web-based version of Release Management.

Although I typically avoid release candidates, this couldn’t wait…

Dude, Where’s My IIS Deployment?

Missing IIS Web Application Deployment Task
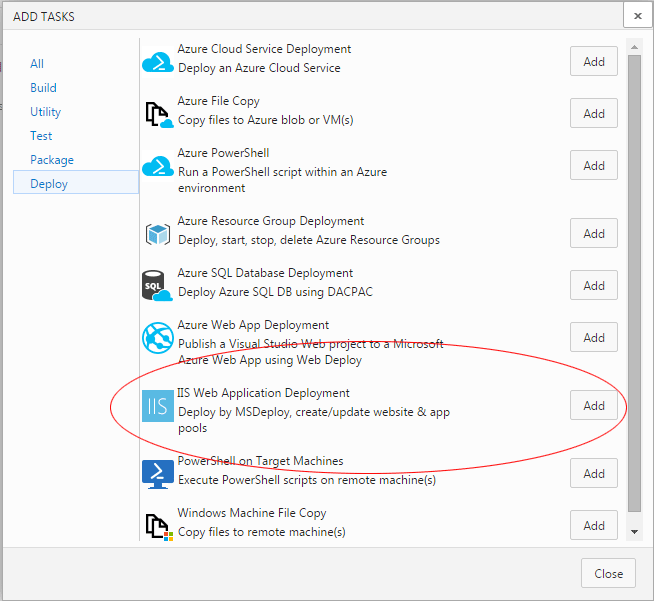
With the new bits installed on the server, I finally had access to the new web-based Release Management UI and could start following along with some of the online tutorials I was seeing for VSTS. In one of those tutorials, I saw reference to an “IIS Web Application Deployment” task. Just the task I needed to deploy my application to IIS! Unfortunately, this task wasn’t available on my on-premise installation?

After a little bit of searching, I found the open source vso-agent-task Github repo for all of the tasks included in VSTS:

Included in that repo is the IISWebAppDeployment task which is missing for my installation. I assumed that the IISWebAppDeployment task wasn’t available simply because it hadn’t been included in the TFS 2015 Update 2 RC1 release. Should be simple enough to fix…

Use The Source

With the source in hand, the next step was figuring out how to get it deployed. I found an article that discussed how to deploy custom tasks… not a task for the faint of heart. As I prepared myself for the task, I learned that since that post was originally made, Microsoft had released the TFS Cross Platform Command Line Interface which not only simplifies the process but is the supported and recommended method for installing extensions.

TFS Cross Platform Command Line Interface

Insallation

Installation of the tool is easy with node.js and npm.

npm -g install tfx-cli

Getting Authenticated

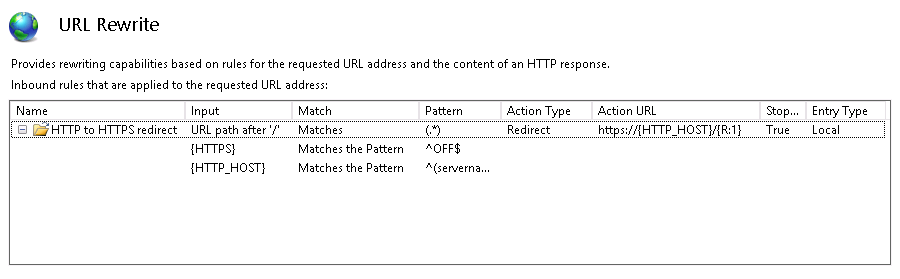
The first step is to get logged into the TFS server. By default, the logon process is going to look for a VSTS personal authentication code which doesn’t apply (yet) to TFS on-premise. Thankfully basic authentication is supported, but you’ll need to enable it on your TFS server. While you’re enabling basic authentication, I strongly encourage you to configure your TFS / IIS server to force SSL. Sending a basic username and password without an encrypted connection is ALWAYS a bad idea.

Run the following command to interactively login:

C:\Users\gheeres\vso-agent-tasks>tfx login --auth-type basic
TFS Cross Platform Command Line Interface v0.3.15
Copyright Microsoft Corporation
> Service URL: https://tfs.heeresonline.com/MyCollection
> Username: tfs-admin@heeresonline.com
> Password:
Logged in successfully

One logged in, you can run additional commands to view the list of installed tasks.

C:\Users\gheeres\vso-agent-tasks>tfx build tasks list
TFS Cross Platform Command Line Interface v0.3.15
Copyright Microsoft Corporation

id            : 7c6a6b71-4355-4afc-a274-480eab5678e9
name          : DecryptFile
friendly name : Decrypt File (OpenSSL)
visibility    : Build,Release
description   : A thin utility task for file decryption using OpenSSL.
version       : 1.0.5

...

If I recall, when I grep‘ed the output for the IISWebAppDeployment task nothing was found. This should be easy. Let get that deployed.

C:\Users\gheeres\vso-agent-tasks>tfx build tasks upload --task-path Tasks\IISWebAppDeployment
TFS Cross Platform Command Line Interface v0.3.15
Copyright Microsoft Corporation
Error: Failed Request: Conflict(409) - A task definition with id 89a3a82d-4b3e-4a09-8d40-a793849dc94f and version 1.0.9 has already
been uploaded. To replace the existing definition, re-register the task definition before uploading the package.

$&!#? Already Been Uploaded? Seriously?

The error tells us that the task, has already been uploaded. But when we search our Task list in the build and release UIs, the “IIS Web Application Deployment” task is still not seen. Hmmm…

If we look at the task.json file, we notice a “visibility” attribute with the value of “Preview”.

  "visibility": [
    "Preview",
    "Build",
    "Release"
  ]

Although I couldn’t find documentation, this “Preview” tag must prevent the UI for seeing the task. So lets get that changed. Edit the Tasks/IISWebAppDeployment/task.json file to remove the “Preview” option, or apply the following patch.

diff --git a/Tasks/IISWebAppDeployment/task.json b/Tasks/IISWebAppDeployment/task.json
index fc1d9b4..2bd1535 100644
--- a/Tasks/IISWebAppDeployment/task.json
+++ b/Tasks/IISWebAppDeployment/task.json
@@ -6,7 +6,6 @@
   "helpMarkDown": "[More Information](http://aka.ms/iiswebappdeployreadme)",
   "category": "Deploy",
   "visibility": [
-    "Preview",
     "Build",
     "Release"
   ],

Overwrite

Now if we try to deploy it again, we’ll get the same error that the task still exists. One solution is to increment the version information. However if you do that, it could break future updates. So instead, we’ll use the –overwrite command. You can view the list of available options by using the –help command. The output is included below:

C:\Users\gheeres\vso-agent-tasks>tfx build tasks upload --help
TFS Cross Platform Command Line Interface v0.3.15
Copyright Microsoft Corporation

                        fTfs
                      fSSSSSSSs
                    fSSSSSSSSSS
     TSSf         fSSSSSSSSSSSS
     SSSSSF     fSSSSSSST SSSSS
     SSfSSSSSsfSSSSSSSt   SSSSS
     SS  tSSSSSSSSSs      SSSSS
     SS   fSSSSSSST       SSSSS
     SS fSSSSSFSSSSSSf    SSSSS
     SSSSSST    FSSSSSSFt SSSSS
     SSSSt        FSSSSSSSSSSSS
                    FSSSSSSSSSS
                       FSSSSSSs
                        FSFs    (TM)

Syntax:
tfx build tasks upload --arg1 arg1val1 arg1val2[...] --arg2 arg2val1 arg2val2[...]

Command: upload
Upload a Build Task.

Arguments:
  --task-path  Local path to a Build Task.
  --overwrite  Overwrite existing Build Task.

Global server command arguments:
  --auth-type    Method of authentication ('pat' or 'basic').
  --username     Username to use for basic authentication.
  --password     Password to use for basic authentication.
  --token        Personal access token.
  --service-url  URL to the service you will connect to, e.g. https://youraccount.visualstudio.com/DefaultCollection.
  --fiddler      Set up the fiddler proxy for HTTP requests (for debugging purposes).
  --proxy        Use the specified proxy server for HTTP traffic.

Global arguments:
  --help       Get help for any command.
  --save       Save arguments for the next time a command in this command group is run.
  --no-prompt  Do not prompt the user for input (instead, raise an error).
  --output     Method to use for output. Options: friendly, json, clipboard.
  --json       Alias for --output json.

To see more commands, type tfx build tasks --help

So let’s try deploying that again with the –overwrite option.

C:\Users\gheeres\vso-agent-tasks>tfx build tasks upload --task-path Tasks\IISWebAppDeployment --overwrite
TFS Cross Platform Command Line Interface v0.3.15
Copyright Microsoft Corporation

Task at C:\Users\gheeres\vso-agent-tasks\Tasks\IISWebAppDeployment uploaded successfully!

SUCCESS!!!

IISWebAppDeployment uploaded successfully!

Checking the list of available tasks, we see that it is now available. In a future post, I walk through our release configuration.

When setting up web applications, typically we want to use SSL by default. Instead of writing custom application code to redirect, we can configure IIS to automatically do the redirection for us.

Installing Url Rewrite

Install Url RewriteTo get started, the first thing you need to do is to use the Web Platform Installer to install the Url Rewrite module. Simply do a search for “rewrite” and then click on Install.

Once installed, you should have a new option available for the machine as well as the site and each application. Setting defined in Url Rewrite can be overridden successively where an application web.config will override the site web.config which will override the server web.config.

Rule To Redirect HTTP to HTTPS

Creating a rewrite for SSL is pretty simple. With the URL Rewrite applet open, follow these steps:

  1. URL Rewrite AppletOpen the “URL Rewrite” applet by double clicking on it.
  2. Add Rule...Click on the “Add Rule(s)…” action at the right.
  3. Url Rewrite - Blank RuleChoose “Blank rule” from the “Inbound rules” and click on the OK button.
  4. Give the rule a name. In this case, let’s call it HTTP to HTTPS redirect
  5. Match UrlSet the regular expression pattern of the url you want to match or apply this filter to.

    Typically you can use (.*) which means to match everything.

    Use the “Test pattern…” to ensure that your regular expression is working correctly. Be careful with trailing slash matches.

  6. Scroll down and expand the conditions grouping and click on the “Add…” button. We’re going to be adding two conditions.
    • HTTPS EnvironmentAdd a match for the HTTPS environment variable checking for the value of OFF.
      Condition Input:
      {HTTPS}
      Pattern:
      ^OFF$
    • HTTP_HOST ConditionLastly we’ll add a match for the server name stored in the HTTP_HOST environment variable. You can omit this if you only have one site configured for your IIS installation.
      Condition Input:
      {HTTP_HOST}
      Pattern:
      ^(servername\d?)(?:\.domain\.com)?$

      Tip:Assuming you append a number to the end of a server name for each web server in the farm or cluster (i.e. servername1.domain.com, servername2.domain.com, etc.), the previous regular expression will match all of server names with a single digit, including servername.domain.com since the “?” match will match on 0 or 1 numbers.

      Adjust the regular expression as necessary for your environment. Make sure to use the “Test Pattern…” button to ensure you have your regular expression correct.

    • Rewrite ConditionsWhen you’re done, you should have two conditions set to Match All.
  7. URL Rewrite - ActionScroll down to the action grouping. Set the following values:
    Action type:
    Redirect
    Redirect URL:
    https://{HTTP_HOST}/{R:1}
    Append query string:
    checked
    Redirect type:
    Permanent (301)
  8. Url Rewrite FinishTo finish, click on the Apply button in the Actions pain at the right.

How It Works

The Url Rewrite applet works by adding configuration sections to the web.config file for the specified location. Instead of using the URL Rewrite, you can manually edit or add the necessary settings with careful XML editing. To do so, add a System.webServer section, if it doesn’t already exist, to your web.config. Then inside of the System.webServer XML element add the rewrite element to the existing element.

<?xml version="1.0" encoding="utf-8"?>
<configuration>
  <system.webServer>
    <rewrite>
      <rules>
        <clear />
        <rule name="HTTP to HTTPS redirect" enabled="true" stopProcessing="true">
          <match url="(.*)" />
          <conditions>
            <add input="{HTTPS}" pattern="^OFF$" />
            <add input="{HTTP_HOST}" pattern="^(servername\d?)(?:\.domain\.com)?$" />
          </conditions>
          <action type="Redirect" url="https://{HTTP_HOST}/{R:1}" />
        </rule>
      </rules>
    </rewrite>
  </system.webServer>
</configuration>

Note: If you manage an on-premise Team Foundation Server (TFS) server, I encourage you to do this by default to avoid your developers accidentally sending their credentials or confidential information in the clear of the network. Please note that each time you apply and update or upgrade to TFS, you’ll need to reapply the settings in the default web.config file. You can find this file at: C:\Program Files\Microsoft Team Foundation Server 14.0\Application Tier\Web Services\web.config

As everyone knows, mocking the HttpContext and associated classes is a nightmare and should just be avoided. I recently joined a different team at work where they were still running a lot of .NET 1.0 code. Most of the code was poorly designed and highly coupled having been written primarily by developers without proper object oriented design training. Calling this code “spaghetti code” would have been an insult to spaghetti code.

How bad? Most methods are over 1000 lines of code, filled with nested if/else statements and copy/pasted code all over. Extracting the business logic from one method and class resulted in 15 new classes. Here is an quick example of the code quality.

if (_username.ToLower().PadRight(12, ' ').Substring(0, 7).Equals("demo123")) {
}

Lots of useless string parsing and casting to wade through… But anyway, that isn’t the point of this post. Long story short is that as I’m modularizing this code I’ve run into the dreaded HttpContext.Current integrated throughout the code. Before I make extensive changes to the code, I wanted to have some unit tests to ensure that I wasn’t breaking the existing functionality as I modified the code. So the first thing I did was to inject the HttpContext as a dependency into the class. Although far from ideal, it allows me to at least run the code outside of IIS.

Here is my test helper to get the HttpContext:

/// <summary>
/// Retreives an HttpContext for testing.
/// </summary>
/// <returns>An HttpContext for testing.</returns>
internal HttpContext GetHttpContext(string url = "http://127.0.0.1/")
{
  var request = new HttpRequest(String.Empty, url, String.Empty);
  var response = new HttpResponse(new StringWriter());
  var context = new HttpContext(request, response);
  return(context);
}

Unfortunately, the code has numereous references to Request.ServerVariables. If you try to add to this NameValueCollection you’ll find that it is a read only collection. Here is the decompiled code:

public sealed class HttpRequest
{
  private HttpServerVarsCollection _serverVariables;
  public NameValueCollection ServerVariables
  {
    get
    {
      if (HttpRuntime.HasAspNetHostingPermission(AspNetHostingPermissionLevel.Low)) {
        return this.GetServerVars();
      }
      return this.GetServerVarsWithDemand();
    }
  }
  private NameValueCollection GetServerVars()
  {
    if (this._serverVariables == null) {
      this._serverVariables = new HttpServerVarsCollection(this._wr, this);
      if (!(this._wr is IIS7WorkerRequest)) {
        this._serverVariables.MakeReadOnly();
      }
    }
    return this._serverVariables;
  }
}

We can’t override ServerVariables since it’s not virtual and there is no setter. Digging deeper finds an internal HttpServerVarsCollection class which has the following Add signature:

public override void Add(string name, string value)
{
  throw new NotSupportedException();
}

The rabbit hole keeps getting deeper. Fortunately we find the AddStatic method which gives us some hope:

internal void AddStatic(string name, string value)
{
  if (value == null) {
    value = string.Empty;
  }
  base.InvalidateCachedArrays();
  base.BaseAdd(name, new HttpServerVarsCollectionEntry(name, value));
}

That looks promising. So let’s try making this work using reflection.

  var field = request.GetType()
                     .GetField("_serverVariables", BindingFlags.Instance | BindingFlags.NonPublic);
  if (field != null) {
    var variables = field.GetValue(request);
    var type = field.FieldType;
    if (variables == null) {
      var constructor = type.GetConstructor(BindingFlags.Instance | BindingFlags.NonPublic, null,
                                            new[] { typeof(HttpWorkerRequest), typeof(HttpRequest) }, null);
      variables = constructor.Invoke(new[] { null, request });
    }
    type.GetProperty("IsReadOnly", BindingFlags.Instance | BindingFlags.NonPublic)
        .SetValue(variables, false, null);
    var addStatic = type.GetMethod("AddStatic", BindingFlags.Instance | BindingFlags.NonPublic);
    addStatic.Invoke(variables, new[] { "REMOTE_ADDR", "127.0.0.1" });
    addStatic.Invoke(variables, new[] { "HTTP_USER_AGENT", "Mozilla/5.0 (Windows NT 6.3; Win64; x64) AppleWebKit/537.36 (KHTML, like Gecko) Chrome/37.0.2049.0 Safari/537.36" });
  }

SUCCESS! But we can do even better. How about we make this code extend the HttpRequest object and clean things up a little.

/// <summary>
/// Extension methods for the HttpRequest class.
/// </summary>
public static class HttpRequestExtensions
{
  /// <summary>
  /// Adds the name/value pair to the ServerVariables for the HttpRequest.
  /// </summary>
  /// <param name="request">The request to append the variables to.</param>
  /// <param name="name">The name of the variable.</param>
  /// <param name="value">The value of the variable.</param>
  public static void AddServerVariable(this HttpRequest request, string name, string value)
  {
    if (request == null) return;

    AddServerVariables(request, new Dictionary<string, string>() {
      { name, value }
    });
  }

  /// <summary>
  /// Adds the name/value pairs to the ServerVariables for the HttpRequest.
  /// </summary>
  /// <param name="request">The request to append the variables to.</param>
  /// <param name="collection">The collection of name/value pairs to add.</param>
  public static void AddServerVariables(this HttpRequest request, NameValueCollection collection)
  {
    if (request == null) return;
    if (collection == null) return;

    AddServerVariables(request, collection.AllKeys
                                          .ToDictionary(k => k, k => collection[k]));
  }

  /// <summary>
  /// Adds the name/value pairs to the ServerVariables for the HttpRequest.
  /// </summary>
  /// <param name="request">The request to append the variables to.</param>
  /// <param name="dictionary">The dictionary containing the pairs to add.</param>
  public static void AddServerVariables(this HttpRequest request, IDictionary<string,string> dictionary)
  {
    if (request == null) return;
    if (dictionary == null) return;

    var field = request.GetType()
                       .GetField("_serverVariables", BindingFlags.Instance | BindingFlags.NonPublic);
    if (field != null) {
      var type = field.FieldType;

      var serverVariables = field.GetValue(request);
      if (serverVariables == null) {
        var constructor = type.GetConstructor(BindingFlags.Instance | BindingFlags.NonPublic, null,
                                              new[] { typeof(HttpWorkerRequest), typeof(HttpRequest) }, null);
        serverVariables = constructor.Invoke(new[] { null, request });
        field.SetValue(request, serverVariables);
      }
      var addStatic = type.GetMethod("AddStatic", BindingFlags.Instance | BindingFlags.NonPublic);

      ((NameValueCollection) serverVariables).MakeWriteable();
      foreach (var item in dictionary) {
        addStatic.Invoke(serverVariables, new[] { item.Key, item.Value });
      }
      ((NameValueCollection)serverVariables).MakeReadOnly();
    }
  }
}

You might have noticed, that I also created a NameValueCollection extension to modify the IsReadOnly property. Of course, use this with care… “with great power comes great responsibility“. The creator of the NameValueCollection you’re consuming likely set the IsReadOnly property for a reason…

/// <summary>
/// Extension methods for the NameValueCollection class.
/// </summary>
public static class NameValueCollectionExtensions
{
  /// <summary>
  /// Retreives the IsReadOnly property from the NameValueCollection
  /// </summary>
  /// <param name="collection">The collection to retrieve the propertyInfo from.</param>
  /// <param name="bindingFlags">The optional BindingFlags to use. If not specified defautls to Instance|NonPublic.</param>
  /// <returns>The PropertyInfo for the IsReadOnly property.</returns>
  private static PropertyInfo GetIsReadOnlyProperty(this NameValueCollection collection, BindingFlags bindingFlags = BindingFlags.Instance | BindingFlags.NonPublic)
  {
    if (collection == null) return (null);
    return(collection.GetType().GetProperty("IsReadOnly", bindingFlags));
  }

  /// <summary>
  /// Sets the IsReadOnly property to the specified value.
  /// </summary>
  /// <param name="collection">The collection to modify.</param>
  /// <param name="isReadOnly">The value to set.</param>
  private static void SetIsReadOnly(this NameValueCollection collection, bool isReadOnly)
  {
    if (collection == null) return;

    var property = GetIsReadOnlyProperty(collection);
    if (property != null) {
      property.SetValue(collection, isReadOnly, null);
    }
  }

  /// <summary>
  /// Makes the specified collection writable via reflection.
  /// </summary>
  /// <param name="collection">The collection to make writable.</param>
  public static void MakeWriteable(this NameValueCollection collection)
  {
    SetIsReadOnly(collection, false);
  }

  /// <summary>
  /// Makes the specified collection readonly via reflection.
  /// </summary>
  /// <param name="collection">The collection to make readonly.</param>
  public static void MakeReadOnly(this NameValueCollection collection)
  {
    SetIsReadOnly(collection, true);
  }
}

And there you have it. A way to add ServerVariables. Keep in mind that this code is extremely fragile because it’s using reflection to access the internal workings of code that we don’t have control over. Below are examples of using the extension method.

public class Example
{
  public void Test() 
  {
    string url = "http://127.0.0.1";
    var request = new HttpRequest(String.Empty, url, String.Empty);
    request.AddServerVariable("REMOTE_ADDR", "127.0.0.1");

    // or
    
    request.AddServerVariables(new Dictionary<string, string>() {
      { "REMOTE_ADDR", "127.0.0.1" },
      { "HTTP_USER_AGENT", "Mozilla/5.0 (Windows NT 6.3; Win64; x64) AppleWebKit/537.36 (KHTML, like Gecko) Chrome/37.0.2049.0 Safari/537.36" }
    });
  }
}

I hope you find this useful and it can save you some time.