For my employer, I’ve been working on setting up a continuous integration and release pipeline using Team Foundation Server (TFS) on-premise. Earlier this year, I had started experimenting with the standalone Release Management 2015 tool. Although I made some progress, the XAML based workflows and client tooling left a lot to be desired and I ended up reverting to using msbuild deployment options directly from the build itself. Not ideal, but better than nothing.

I was ecstatic to learn that a web-based version of Release Management had been integrated into Visual Studio Team Services (VSTS), formerly Visual Studio Online, as part of a preview release. But much to my dismay, the new Release Management (in preview), wasn’t scheduled to be available for on-premise TFS until later in 2016. VSTS typically get’s new updates every three weeks, with those updates rolled to TFS on-premise on a quarterly cycle. It was clear that the Release Management 2015 client and server tool were going away so it didn’t pay time to continue exploring the solution.

An Early Birthday Present!

After resigning myself to the fact that I’d have to wait to get my hands on the new Release Management tools, the release candidate for TFS 2015 Update 2 was announced. Much to my surprise and excitement TFS 2015 Update 2 RC1 included the new web-based version of Release Management.

Although I typically avoid release candidates, this couldn’t wait…

Dude, Where’s My IIS Deployment?
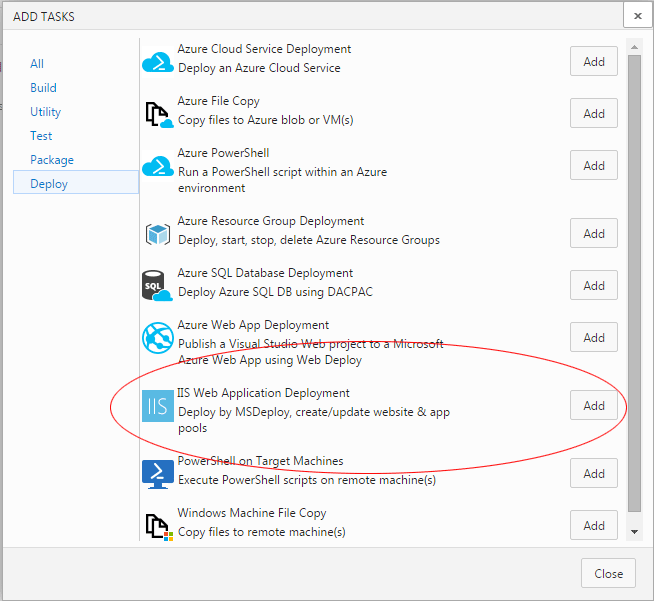
Missing IIS Web Application Deployment TaskWith the new bits installed on the server, I finally had access to the new web-based Release Management UI and could start following along with some of the online tutorials I was seeing for VSTS. In one of those tutorials, I saw reference to an “IIS Web Application Deployment” task. Just the task I needed to deploy my application to IIS! Unfortunately, this task wasn’t available on my on-premise installation?

After a little bit of searching, I found the open source vso-agent-task Github repo for all of the tasks included in VSTS:

Included in that repo is the IISWebAppDeployment task which is missing for my installation. I assumed that the IISWebAppDeployment task wasn’t available simply because it hadn’t been included in the TFS 2015 Update 2 RC1 release. Should be simple enough to fix…

Use The Source

With the source in hand, the next step was figuring out how to get it deployed. I found an article that discussed how to deploy custom tasks… not a task for the faint of heart. As I prepared myself for the task, I learned that since that post was originally made, Microsoft had released the TFS Cross Platform Command Line Interface which not only simplifies the process but is the supported and recommended method for installing extensions.

TFS Cross Platform Command Line Interface

Insallation

Installation of the tool is easy with node.js and npm.

npm -g install tfx-cli

Getting Authenticated

The first step is to get logged into the TFS server. By default, the logon process is going to look for a VSTS personal authentication code which doesn’t apply (yet) to TFS on-premise. Thankfully basic authentication is supported, but you’ll need to enable it on your TFS server. While you’re enabling basic authentication, I strongly encourage you to configure your TFS / IIS server to force SSL. Sending a basic username and password without an encrypted connection is ALWAYS a bad idea.

Run the following command to interactively login:

C:\Users\gheeres\vso-agent-tasks>tfx login --auth-type basic
TFS Cross Platform Command Line Interface v0.3.15
Copyright Microsoft Corporation
> Service URL: https://tfs.heeresonline.com/MyCollection
> Username: tfs-admin@heeresonline.com
> Password:
Logged in successfully

One logged in, you can run additional commands to view the list of installed tasks.

C:\Users\gheeres\vso-agent-tasks>tfx build tasks list
TFS Cross Platform Command Line Interface v0.3.15
Copyright Microsoft Corporation

id            : 7c6a6b71-4355-4afc-a274-480eab5678e9
name          : DecryptFile
friendly name : Decrypt File (OpenSSL)
visibility    : Build,Release
description   : A thin utility task for file decryption using OpenSSL.
version       : 1.0.5

...

If I recall, when I grep‘ed the output for the IISWebAppDeployment task nothing was found. This should be easy. Let get that deployed.

C:\Users\gheeres\vso-agent-tasks>tfx build tasks upload --task-path Tasks\IISWebAppDeployment
TFS Cross Platform Command Line Interface v0.3.15
Copyright Microsoft Corporation
Error: Failed Request: Conflict(409) - A task definition with id 89a3a82d-4b3e-4a09-8d40-a793849dc94f and version 1.0.9 has already
been uploaded. To replace the existing definition, re-register the task definition before uploading the package.

$&!#? Already Been Uploaded? Seriously?

The error tells us that the task, has already been uploaded. But when we search our Task list in the build and release UIs, the “IIS Web Application Deployment” task is still not seen. Hmmm…

If we look at the task.json file, we notice a “visibility” attribute with the value of “Preview”.

  "visibility": [
    "Preview",
    "Build",
    "Release"
  ]

Although I couldn’t find documentation, this “Preview” tag must prevent the UI for seeing the task. So lets get that changed. Edit the Tasks/IISWebAppDeployment/task.json file to remove the “Preview” option, or apply the following patch.

diff --git a/Tasks/IISWebAppDeployment/task.json b/Tasks/IISWebAppDeployment/task.json
index fc1d9b4..2bd1535 100644
--- a/Tasks/IISWebAppDeployment/task.json
+++ b/Tasks/IISWebAppDeployment/task.json
@@ -6,7 +6,6 @@
   "helpMarkDown": "[More Information](http://aka.ms/iiswebappdeployreadme)",
   "category": "Deploy",
   "visibility": [
-    "Preview",
     "Build",
     "Release"
   ],

Overwrite

Now if we try to deploy it again, we’ll get the same error that the task still exists. One solution is to increment the version information. However if you do that, it could break future updates. So instead, we’ll use the –overwrite command. You can view the list of available options by using the –help command. The output is included below:

C:\Users\gheeres\vso-agent-tasks>tfx build tasks upload --help
TFS Cross Platform Command Line Interface v0.3.15
Copyright Microsoft Corporation

                        fTfs
                      fSSSSSSSs
                    fSSSSSSSSSS
     TSSf         fSSSSSSSSSSSS
     SSSSSF     fSSSSSSST SSSSS
     SSfSSSSSsfSSSSSSSt   SSSSS
     SS  tSSSSSSSSSs      SSSSS
     SS   fSSSSSSST       SSSSS
     SS fSSSSSFSSSSSSf    SSSSS
     SSSSSST    FSSSSSSFt SSSSS
     SSSSt        FSSSSSSSSSSSS
                    FSSSSSSSSSS
                       FSSSSSSs
                        FSFs    (TM)

Syntax:
tfx build tasks upload --arg1 arg1val1 arg1val2[...] --arg2 arg2val1 arg2val2[...]

Command: upload
Upload a Build Task.

Arguments:
  --task-path  Local path to a Build Task.
  --overwrite  Overwrite existing Build Task.

Global server command arguments:
  --auth-type    Method of authentication ('pat' or 'basic').
  --username     Username to use for basic authentication.
  --password     Password to use for basic authentication.
  --token        Personal access token.
  --service-url  URL to the service you will connect to, e.g. https://youraccount.visualstudio.com/DefaultCollection.
  --fiddler      Set up the fiddler proxy for HTTP requests (for debugging purposes).
  --proxy        Use the specified proxy server for HTTP traffic.

Global arguments:
  --help       Get help for any command.
  --save       Save arguments for the next time a command in this command group is run.
  --no-prompt  Do not prompt the user for input (instead, raise an error).
  --output     Method to use for output. Options: friendly, json, clipboard.
  --json       Alias for --output json.

To see more commands, type tfx build tasks --help

So let’s try deploying that again with the –overwrite option.

C:\Users\gheeres\vso-agent-tasks>tfx build tasks upload --task-path Tasks\IISWebAppDeployment --overwrite
TFS Cross Platform Command Line Interface v0.3.15
Copyright Microsoft Corporation

Task at C:\Users\gheeres\vso-agent-tasks\Tasks\IISWebAppDeployment uploaded successfully!

SUCCESS!!!

IISWebAppDeployment uploaded successfully!

Checking the list of available tasks, we see that it is now available. In a future post, I walk through our release configuration.

When setting up web applications, typically we want to use SSL by default. Instead of writing custom application code to redirect, we can configure IIS to automatically do the redirection for us.

Installing Url Rewrite

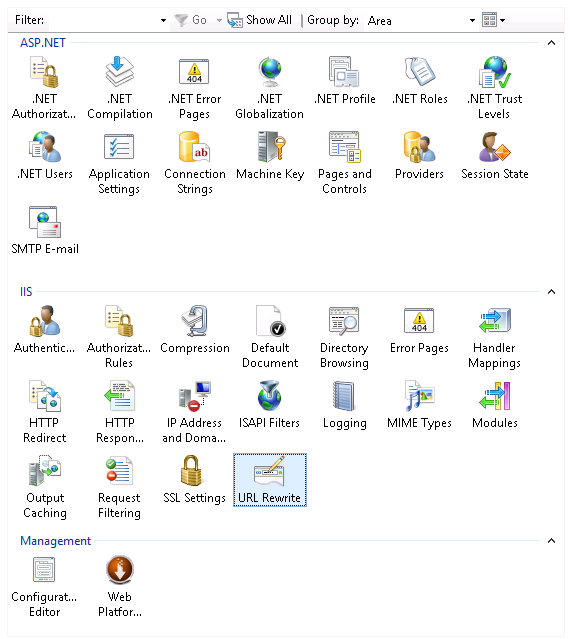
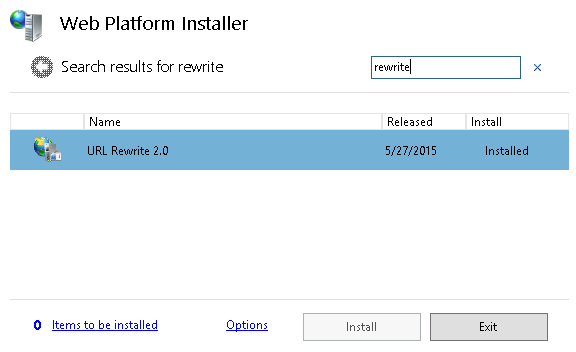
Install Url RewriteTo get started, the first thing you need to do is to use the Web Platform Installer to install the Url Rewrite module. Simply do a search for “rewrite” and then click on Install.

Once installed, you should have a new option available for the machine as well as the site and each application. Setting defined in Url Rewrite can be overridden successively where an application web.config will override the site web.config which will override the server web.config.

Rule To Redirect HTTP to HTTPS

Creating a rewrite for SSL is pretty simple. With the URL Rewrite applet open, follow these steps:

  1. URL Rewrite AppletOpen the “URL Rewrite” applet by double clicking on it.
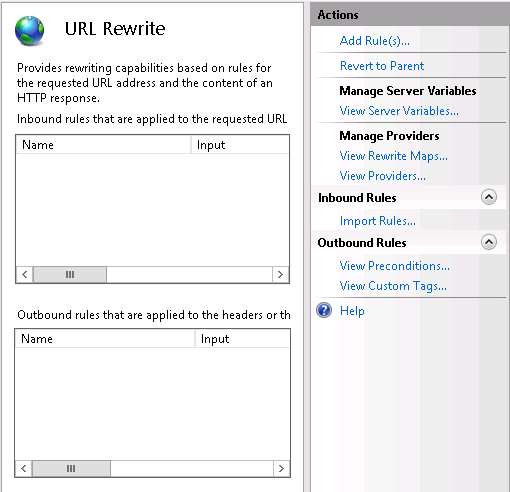
  2. Add Rule...Click on the “Add Rule(s)…” action at the right.
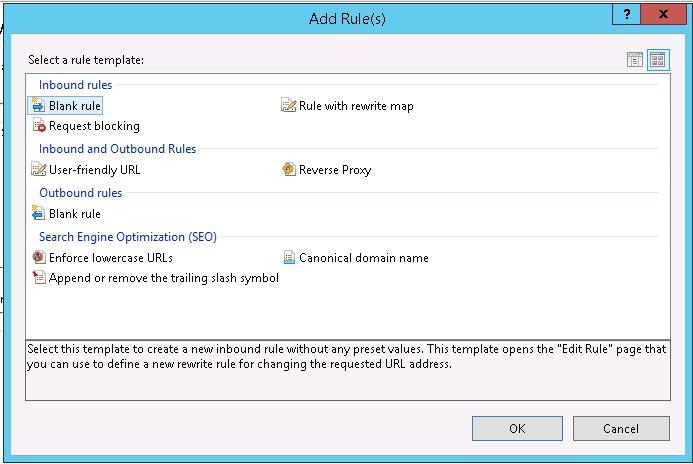
  3. Url Rewrite - Blank RuleChoose “Blank rule” from the “Inbound rules” and click on the OK button.
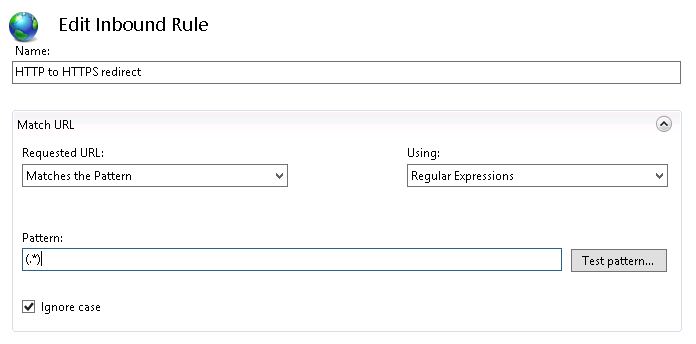
  4. Give the rule a name. In this case, let’s call it HTTP to HTTPS redirect
  5. Match UrlSet the regular expression pattern of the url you want to match or apply this filter to.

    Typically you can use (.*) which means to match everything.

    Use the “Test pattern…” to ensure that your regular expression is working correctly. Be careful with trailing slash matches.

  6. Scroll down and expand the conditions grouping and click on the “Add…” button. We’re going to be adding two conditions.
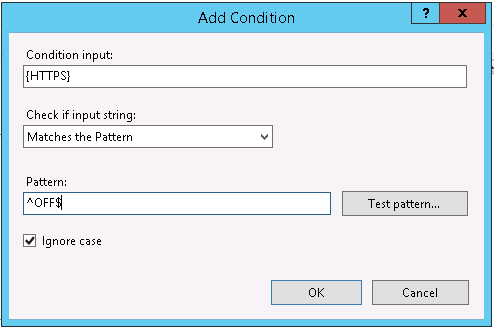
    • HTTPS EnvironmentAdd a match for the HTTPS environment variable checking for the value of OFF.
      Condition Input:
      {HTTPS}
      Pattern:
      ^OFF$
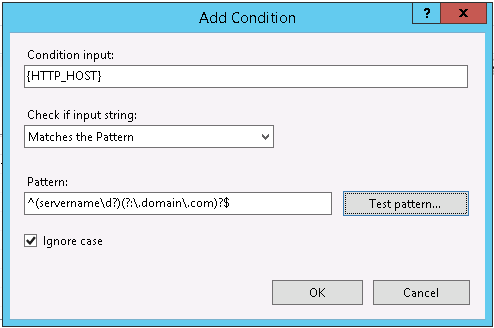
    • HTTP_HOST ConditionLastly we’ll add a match for the server name stored in the HTTP_HOST environment variable. You can omit this if you only have one site configured for your IIS installation.
      Condition Input:
      {HTTP_HOST}
      Pattern:
      ^(servername\d?)(?:\.domain\.com)?$

      Tip:Assuming you append a number to the end of a server name for each web server in the farm or cluster (i.e. servername1.domain.com, servername2.domain.com, etc.), the previous regular expression will match all of server names with a single digit, including servername.domain.com since the “?” match will match on 0 or 1 numbers.

      Adjust the regular expression as necessary for your environment. Make sure to use the “Test Pattern…” button to ensure you have your regular expression correct.

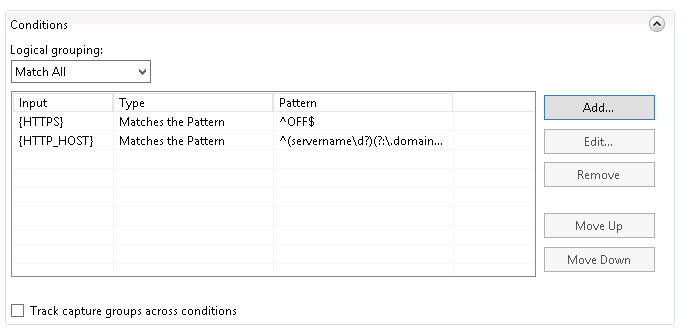
    • Rewrite ConditionsWhen you’re done, you should have two conditions set to Match All.
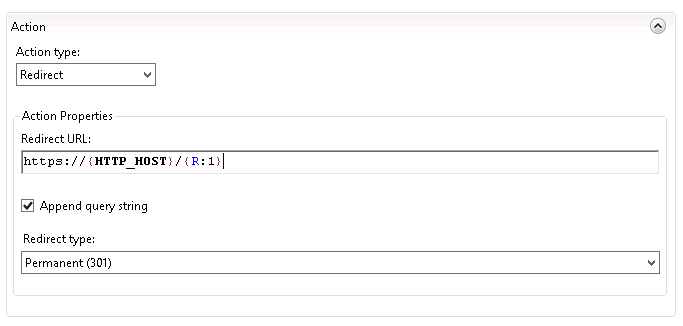
  7. URL Rewrite - ActionScroll down to the action grouping. Set the following values:
    Action type:
    Redirect
    Redirect URL:
    https://{HTTP_HOST}/{R:1}
    Append query string:
    checked
    Redirect type:
    Permanent (301)
  8. Url Rewrite FinishTo finish, click on the Apply button in the Actions pain at the right.

How It Works

The Url Rewrite applet works by adding configuration sections to the web.config file for the specified location. Instead of using the URL Rewrite, you can manually edit or add the necessary settings with careful XML editing. To do so, add a System.webServer section, if it doesn’t already exist, to your web.config. Then inside of the System.webServer XML element add the rewrite element to the existing element.

<?xml version="1.0" encoding="utf-8"?>
<configuration>
  <system.webServer>
    <rewrite>
      <rules>
        <clear />
        <rule name="HTTP to HTTPS redirect" enabled="true" stopProcessing="true">
          <match url="(.*)" />
          <conditions>
            <add input="{HTTPS}" pattern="^OFF$" />
            <add input="{HTTP_HOST}" pattern="^(servername\d?)(?:\.domain\.com)?$" />
          </conditions>
          <action type="Redirect" url="https://{HTTP_HOST}/{R:1}" />
        </rule>
      </rules>
    </rewrite>
  </system.webServer>
</configuration>

Note: If you manage an on-premise Team Foundation Server (TFS) server, I encourage you to do this by default to avoid your developers accidentally sending their credentials or confidential information in the clear of the network. Please note that each time you apply and update or upgrade to TFS, you’ll need to reapply the settings in the default web.config file. You can find this file at: C:\Program Files\Microsoft Team Foundation Server 14.0\Application Tier\Web Services\web.config

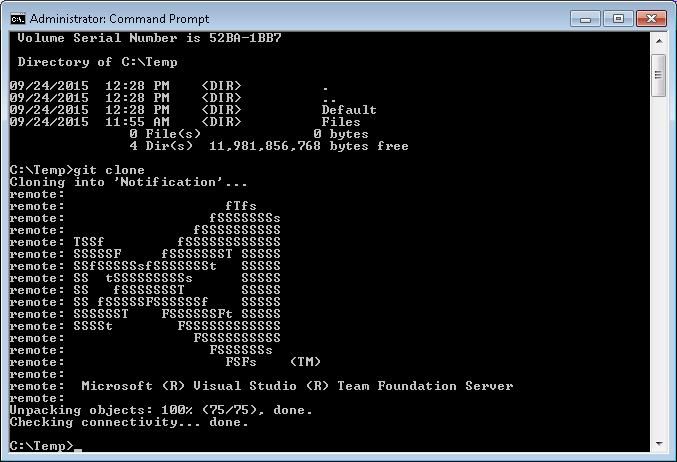
I stumbled across a link to the CommandPromptHere git hub repository and immediately thought to myself…

Hey I could use that!

So I installed it but it wasn’t quite what I wanted. In particular, like the built-in “open command window here” option, I only wanted it available when I held down the shift key.

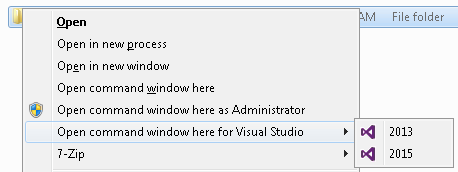
So after a bit of digging, I stumbled across the Microsoft article titled Creating Shortcut Menu Handlers. While reading the article, I discovered that through the registry we could create cascading menus. Hmm… I liked that idea even better. So after a bit more reading and frustration due to the poor documentation, I finally found success!!!

opencommandwindowhere-custom

commandprompt-defaultregistryAlthough I still hadn’t solved my original desire which was to make it activate only when you “Shift” right-click. Inspecting the default registry key (HKCR\Directory\Shell\Cmd), we find an empty string value labeled “Extended”. By simply adding this empty string value to our command, it now works as intended. That was easy!

But why stop there? How about an elevated command prompt? So a quick search lands us on the seven forums page labeled Add or Remove “Open Command Window Here as Administrator” to Context Menu. Add those registry settings and we’re all set.

Of course you can continue to customize to suit your needs and preferences.

For reference, here is the completed registry file.

[ Download ]

Windows Registry Editor Version 5.00

[HKEY_CLASSES_ROOT\Directory\Background]

[HKEY_CLASSES_ROOT\Directory\Background\shell]

[HKEY_CLASSES_ROOT\Directory\Background\shell\cmd]
@="@shell32.dll,-8506"
"Extended"=""
"NoWorkingDirectory"=""

[HKEY_CLASSES_ROOT\Directory\Background\shell\cmd\command]
@="cmd.exe /s /k pushd \"%V\""

[HKEY_CLASSES_ROOT\Directory\Background\shell\runas]
@="Open command window here as Administrator"
"Extended"=""
"HasLUAShield"=""

[HKEY_CLASSES_ROOT\Directory\Background\shell\runas\command]
@="cmd.exe /s /k pushd \"%V\""

[HKEY_CLASSES_ROOT\Directory\Background\shell\VisualStudio]
"Extended"=""
"subcommands"=""
"MUIVerb"="Open command window here for Visual Studio"

[HKEY_CLASSES_ROOT\Directory\Background\shell\VisualStudio\Shell]

[HKEY_CLASSES_ROOT\Directory\Background\shell\VisualStudio\Shell\2013CmdHere]
@="VS 2013 Prompt"
"Icon"="C:\\Program Files (x86)\\Microsoft Visual Studio 12.0\\Common7\\IDE\\devenv.exe,0"

[HKEY_CLASSES_ROOT\Directory\Background\shell\VisualStudio\Shell\2013CmdHere\command]
@="C:\\Windows\\system32\\cmd.exe /k cd \"%V\" && \"C:\\Program Files (x86)\\Microsoft Visual Studio 12.0\\Common7\\Tools\\VsDevCmd.bat\""

[HKEY_CLASSES_ROOT\Directory\Background\shell\VisualStudio\Shell\2015CmdHere]
@="VS 2015 Prompt"
"Icon"="C:\\Program Files (x86)\\Microsoft Visual Studio 14.0\\Common7\\IDE\\devenv.exe,0"

[HKEY_CLASSES_ROOT\Directory\Background\shell\VisualStudio\Shell\2015CmdHere\command]
@="C:\\Windows\\system32\\cmd.exe /k cd \"%1\" && \"C:\\Program Files (x86)\\Microsoft Visual Studio 14.0\\Common7\\Tools\\VsDevCmd.bat\""

[HKEY_CLASSES_ROOT\Directory\shell\runas]
@="Open command window here as Administrator"
"Extended"=""
"HasLUAShield"=""

[HKEY_CLASSES_ROOT\Directory\shell\runas\command]
@="cmd.exe /s /k pushd \"%V\""

[HKEY_CLASSES_ROOT\Directory\shell\VisualStudio]
"Extended"=""
"subcommands"=""
"MUIVerb"="Open command window here for Visual Studio"

[HKEY_CLASSES_ROOT\Directory\shell\VisualStudio\Shell]

[HKEY_CLASSES_ROOT\Directory\shell\VisualStudio\Shell\2013CmdHere]
@="2013"
"Icon"="C:\\Program Files (x86)\\Microsoft Visual Studio 12.0\\Common7\\IDE\\devenv.exe,0"

[HKEY_CLASSES_ROOT\Directory\shell\VisualStudio\Shell\2013CmdHere\command]
@="C:\\Windows\\system32\\cmd.exe /k cd \"%V\" && \"C:\\Program Files (x86)\\Microsoft Visual Studio 12.0\\Common7\\Tools\\VsDevCmd.bat\""

[HKEY_CLASSES_ROOT\Directory\shell\VisualStudio\Shell\2015CmdHere]
@="2015"
"Icon"="C:\\Program Files (x86)\\Microsoft Visual Studio 14.0\\Common7\\IDE\\devenv.exe,0"

[HKEY_CLASSES_ROOT\Directory\shell\VisualStudio\Shell\2015CmdHere\command]
@="C:\\Windows\\system32\\cmd.exe /k cd \"%1\" && \"C:\\Program Files (x86)\\Microsoft Visual Studio 14.0\\Common7\\Tools\\VsDevCmd.bat\""

[HKEY_CLASSES_ROOT\Drive\Background]

[HKEY_CLASSES_ROOT\Drive\Background\shell]

[HKEY_CLASSES_ROOT\Drive\Background\shell\cmd]
@="@shell32.dll,-8506"
"Extended"=""
"NoWorkingDirectory"=""

[HKEY_CLASSES_ROOT\Drive\Background\shell\cmd\command]
@="cmd.exe /s /k pushd \"%V\""

[HKEY_CLASSES_ROOT\Drive\Background\shell\runas]
@="Open command window here as Administrator"
"Extended"=""
"HasLUAShield"=""

[HKEY_CLASSES_ROOT\Drive\Background\shell\runas\command]
@="cmd.exe /s /k pushd \"%V\""

[HKEY_CLASSES_ROOT\Drive\Background\shell\VisualStudio]
"Extended"=""
"subcommands"=""
"MUIVerb"="Open command window here for Visual Studio"

[HKEY_CLASSES_ROOT\Drive\Background\shell\VisualStudio\Shell]

[HKEY_CLASSES_ROOT\Drive\Background\shell\VisualStudio\Shell\2013CmdHere]
@="VS 2013 Prompt"
"Icon"="C:\\Program Files (x86)\\Microsoft Visual Studio 12.0\\Common7\\IDE\\devenv.exe,0"

[HKEY_CLASSES_ROOT\Drive\Background\shell\VisualStudio\Shell\2013CmdHere\command]
@="C:\\Windows\\system32\\cmd.exe /k cd \"%V\" && \"C:\\Program Files (x86)\\Microsoft Visual Studio 12.0\\Common7\\Tools\\VsDevCmd.bat\""

[HKEY_CLASSES_ROOT\Drive\Background\shell\VisualStudio\Shell\2015CmdHere]
@="VS 2015 Prompt"
"Icon"="C:\\Program Files (x86)\\Microsoft Visual Studio 14.0\\Common7\\IDE\\devenv.exe,0"

[HKEY_CLASSES_ROOT\Drive\Background\shell\VisualStudio\Shell\2015CmdHere\command]
@="C:\\Windows\\system32\\cmd.exe /k cd \"%1\" && \"C:\\Program Files (x86)\\Microsoft Visual Studio 14.0\\Common7\\Tools\\VsDevCmd.bat\""

[HKEY_CLASSES_ROOT\Drive\shell\runas]
@="Open command window here as Administrator"
"Extended"=""
"HasLUAShield"=""

[HKEY_CLASSES_ROOT\Drive\shell\runas\command]
@="cmd.exe /s /k pushd \"%V\""

[HKEY_CLASSES_ROOT\Drive\shell\VisualStudio]
"Extended"=""
"subcommands"=""
"MUIVerb"="Open command window here for Visual Studio"

[HKEY_CLASSES_ROOT\Drive\shell\VisualStudio\Shell]

[HKEY_CLASSES_ROOT\Drive\shell\VisualStudio\Shell\2013CmdHere]
@="2013"
"Icon"="C:\\Program Files (x86)\\Microsoft Visual Studio 12.0\\Common7\\IDE\\devenv.exe,0"

[HKEY_CLASSES_ROOT\Drive\shell\VisualStudio\Shell\2013CmdHere\command]
@="C:\\Windows\\system32\\cmd.exe /k cd \"%V\" && \"C:\\Program Files (x86)\\Microsoft Visual Studio 12.0\\Common7\\Tools\\VsDevCmd.bat\""

[HKEY_CLASSES_ROOT\Drive\shell\VisualStudio\Shell\2015CmdHere]
@="2015"
"Icon"="C:\\Program Files (x86)\\Microsoft Visual Studio 14.0\\Common7\\IDE\\devenv.exe,0"

[HKEY_CLASSES_ROOT\Drive\shell\VisualStudio\Shell\2015CmdHere\command]
@="C:\\Windows\\system32\\cmd.exe /k cd \"%1\" && \"C:\\Program Files (x86)\\Microsoft Visual Studio 14.0\\Common7\\Tools\\VsDevCmd.bat\""

As everyone knows, mocking the HttpContext and associated classes is a nightmare and should just be avoided. I recently joined a different team at work where they were still running a lot of .NET 1.0 code. Most of the code was poorly designed and highly coupled having been written primarily by developers without proper object oriented design training. Calling this code “spaghetti code” would have been an insult to spaghetti code.

How bad? Most methods are over 1000 lines of code, filled with nested if/else statements and copy/pasted code all over. Extracting the business logic from one method and class resulted in 15 new classes. Here is an quick example of the code quality.

if (_username.ToLower().PadRight(12, ' ').Substring(0, 7).Equals("demo123")) {
}

Lots of useless string parsing and casting to wade through… But anyway, that isn’t the point of this post. Long story short is that as I’m modularizing this code I’ve run into the dreaded HttpContext.Current integrated throughout the code. Before I make extensive changes to the code, I wanted to have some unit tests to ensure that I wasn’t breaking the existing functionality as I modified the code. So the first thing I did was to inject the HttpContext as a dependency into the class. Although far from ideal, it allows me to at least run the code outside of IIS.

Here is my test helper to get the HttpContext:

/// <summary>
/// Retreives an HttpContext for testing.
/// </summary>
/// <returns>An HttpContext for testing.</returns>
internal HttpContext GetHttpContext(string url = "http://127.0.0.1/")
{
  var request = new HttpRequest(String.Empty, url, String.Empty);
  var response = new HttpResponse(new StringWriter());
  var context = new HttpContext(request, response);
  return(context);
}

Unfortunately, the code has numereous references to Request.ServerVariables. If you try to add to this NameValueCollection you’ll find that it is a read only collection. Here is the decompiled code:

public sealed class HttpRequest
{
  private HttpServerVarsCollection _serverVariables;
  public NameValueCollection ServerVariables
  {
    get
    {
      if (HttpRuntime.HasAspNetHostingPermission(AspNetHostingPermissionLevel.Low)) {
        return this.GetServerVars();
      }
      return this.GetServerVarsWithDemand();
    }
  }
  private NameValueCollection GetServerVars()
  {
    if (this._serverVariables == null) {
      this._serverVariables = new HttpServerVarsCollection(this._wr, this);
      if (!(this._wr is IIS7WorkerRequest)) {
        this._serverVariables.MakeReadOnly();
      }
    }
    return this._serverVariables;
  }
}

We can’t override ServerVariables since it’s not virtual and there is no setter. Digging deeper finds an internal HttpServerVarsCollection class which has the following Add signature:

public override void Add(string name, string value)
{
  throw new NotSupportedException();
}

The rabbit hole keeps getting deeper. Fortunately we find the AddStatic method which gives us some hope:

internal void AddStatic(string name, string value)
{
  if (value == null) {
    value = string.Empty;
  }
  base.InvalidateCachedArrays();
  base.BaseAdd(name, new HttpServerVarsCollectionEntry(name, value));
}

That looks promising. So let’s try making this work using reflection.

  var field = request.GetType()
                     .GetField("_serverVariables", BindingFlags.Instance | BindingFlags.NonPublic);
  if (field != null) {
    var variables = field.GetValue(request);
    var type = field.FieldType;
    if (variables == null) {
      var constructor = type.GetConstructor(BindingFlags.Instance | BindingFlags.NonPublic, null,
                                            new[] { typeof(HttpWorkerRequest), typeof(HttpRequest) }, null);
      variables = constructor.Invoke(new[] { null, request });
    }
    type.GetProperty("IsReadOnly", BindingFlags.Instance | BindingFlags.NonPublic)
        .SetValue(variables, false, null);
    var addStatic = type.GetMethod("AddStatic", BindingFlags.Instance | BindingFlags.NonPublic);
    addStatic.Invoke(variables, new[] { "REMOTE_ADDR", "127.0.0.1" });
    addStatic.Invoke(variables, new[] { "HTTP_USER_AGENT", "Mozilla/5.0 (Windows NT 6.3; Win64; x64) AppleWebKit/537.36 (KHTML, like Gecko) Chrome/37.0.2049.0 Safari/537.36" });
  }

SUCCESS! But we can do even better. How about we make this code extend the HttpRequest object and clean things up a little.

/// <summary>
/// Extension methods for the HttpRequest class.
/// </summary>
public static class HttpRequestExtensions
{
  /// <summary>
  /// Adds the name/value pair to the ServerVariables for the HttpRequest.
  /// </summary>
  /// <param name="request">The request to append the variables to.</param>
  /// <param name="name">The name of the variable.</param>
  /// <param name="value">The value of the variable.</param>
  public static void AddServerVariable(this HttpRequest request, string name, string value)
  {
    if (request == null) return;

    AddServerVariables(request, new Dictionary<string, string>() {
      { name, value }
    });
  }

  /// <summary>
  /// Adds the name/value pairs to the ServerVariables for the HttpRequest.
  /// </summary>
  /// <param name="request">The request to append the variables to.</param>
  /// <param name="collection">The collection of name/value pairs to add.</param>
  public static void AddServerVariables(this HttpRequest request, NameValueCollection collection)
  {
    if (request == null) return;
    if (collection == null) return;

    AddServerVariables(request, collection.AllKeys
                                          .ToDictionary(k => k, k => collection[k]));
  }

  /// <summary>
  /// Adds the name/value pairs to the ServerVariables for the HttpRequest.
  /// </summary>
  /// <param name="request">The request to append the variables to.</param>
  /// <param name="dictionary">The dictionary containing the pairs to add.</param>
  public static void AddServerVariables(this HttpRequest request, IDictionary<string,string> dictionary)
  {
    if (request == null) return;
    if (dictionary == null) return;

    var field = request.GetType()
                       .GetField("_serverVariables", BindingFlags.Instance | BindingFlags.NonPublic);
    if (field != null) {
      var type = field.FieldType;

      var serverVariables = field.GetValue(request);
      if (serverVariables == null) {
        var constructor = type.GetConstructor(BindingFlags.Instance | BindingFlags.NonPublic, null,
                                              new[] { typeof(HttpWorkerRequest), typeof(HttpRequest) }, null);
        serverVariables = constructor.Invoke(new[] { null, request });
        field.SetValue(request, serverVariables);
      }
      var addStatic = type.GetMethod("AddStatic", BindingFlags.Instance | BindingFlags.NonPublic);

      ((NameValueCollection) serverVariables).MakeWriteable();
      foreach (var item in dictionary) {
        addStatic.Invoke(serverVariables, new[] { item.Key, item.Value });
      }
      ((NameValueCollection)serverVariables).MakeReadOnly();
    }
  }
}

You might have noticed, that I also created a NameValueCollection extension to modify the IsReadOnly property. Of course, use this with care… “with great power comes great responsibility“. The creator of the NameValueCollection you’re consuming likely set the IsReadOnly property for a reason…

/// <summary>
/// Extension methods for the NameValueCollection class.
/// </summary>
public static class NameValueCollectionExtensions
{
  /// <summary>
  /// Retreives the IsReadOnly property from the NameValueCollection
  /// </summary>
  /// <param name="collection">The collection to retrieve the propertyInfo from.</param>
  /// <param name="bindingFlags">The optional BindingFlags to use. If not specified defautls to Instance|NonPublic.</param>
  /// <returns>The PropertyInfo for the IsReadOnly property.</returns>
  private static PropertyInfo GetIsReadOnlyProperty(this NameValueCollection collection, BindingFlags bindingFlags = BindingFlags.Instance | BindingFlags.NonPublic)
  {
    if (collection == null) return (null);
    return(collection.GetType().GetProperty("IsReadOnly", bindingFlags));
  }

  /// <summary>
  /// Sets the IsReadOnly property to the specified value.
  /// </summary>
  /// <param name="collection">The collection to modify.</param>
  /// <param name="isReadOnly">The value to set.</param>
  private static void SetIsReadOnly(this NameValueCollection collection, bool isReadOnly)
  {
    if (collection == null) return;

    var property = GetIsReadOnlyProperty(collection);
    if (property != null) {
      property.SetValue(collection, isReadOnly, null);
    }
  }

  /// <summary>
  /// Makes the specified collection writable via reflection.
  /// </summary>
  /// <param name="collection">The collection to make writable.</param>
  public static void MakeWriteable(this NameValueCollection collection)
  {
    SetIsReadOnly(collection, false);
  }

  /// <summary>
  /// Makes the specified collection readonly via reflection.
  /// </summary>
  /// <param name="collection">The collection to make readonly.</param>
  public static void MakeReadOnly(this NameValueCollection collection)
  {
    SetIsReadOnly(collection, true);
  }
}

And there you have it. A way to add ServerVariables. Keep in mind that this code is extremely fragile because it’s using reflection to access the internal workings of code that we don’t have control over. Below are examples of using the extension method.

public class Example
{
  public void Test() 
  {
    string url = "http://127.0.0.1";
    var request = new HttpRequest(String.Empty, url, String.Empty);
    request.AddServerVariable("REMOTE_ADDR", "127.0.0.1");

    // or
    
    request.AddServerVariables(new Dictionary<string, string>() {
      { "REMOTE_ADDR", "127.0.0.1" },
      { "HTTP_USER_AGENT", "Mozilla/5.0 (Windows NT 6.3; Win64; x64) AppleWebKit/537.36 (KHTML, like Gecko) Chrome/37.0.2049.0 Safari/537.36" }
    });
  }
}

I hope you find this useful and it can save you some time.

If you deal with SSL certificates long enough, eventually you’ll run into a trust issue or error regardless of what programming language you are using. Dealing with SSL certificates can be confusing at first, but hopefully this article can simplify a few things or at least get you past the error.

Recently, a user reported the following error when using my node-activedirectory plugin. The error was:

throw er; // Unhandled 'error' event
^
Error: CERT_UNTRUSTED
at SecurePair. (tls.js:1370:32)
at SecurePair.EventEmitter.emit (events.js:92:17)
at SecurePair.maybeInitFinished (tls.js:982:10)
at CleartextStream.read as _read
at CleartextStream.Readable.read (_stream_readable.js:320:10)
at EncryptedStream.write as _write
at doWrite (_stream_writable.js:226:10)
at writeOrBuffer (_stream_writable.js:216:5)
at EncryptedStream.Writable.write (_stream_writable.js:183:11)
at write (_stream_readable.js:583:24)

Well, what does that mean? At first you might think something is wrong with your code or perhaps a problem with the library you are using. No, that’s not the problem. The basic problem is that the SSL certificate the remote server is sending you is not “trusted” by your computer or potentially it has been tampered with (i.e. man-in-the middle attack).

What do you mean by “trusted”? I just want my connection encrypted!

Default List of Trusted Certificates
The “trust” is a key part of what makes SSL work. With SSL, there are a number of certificate authorities (CA) which your computer has been preconfigured to “trust”. When someone needs an SSL certificate, they will typically send their request to a certificate authority to “sign” their certificate which creates a “chain of trust”. With SSL, if you trust a certificate, you trust that certificate and all of the certificates below it or certificates which that certificate has “signed” or verified for integrity. Although your computer was preconfigured with a bunch of trusted certificate authorities, you can add or remove from that list as needed. A certificate can also be signed by itself, this is referred to as a self-signed certificate and is common for quick testing and securing internal resources when a public key infrastructure (PKI) doesn’t exist. There is also a method for revoking bad or hacked certificates which is beyond the scope of this article; just know that this is typically referred to as a “certificate revocation list” or CRL for short.

That brief introduction was only 300,000 foot view and barely does the topic justice but should be sufficient background to understand the error. To learn even more visit the following links:

TL;DR – How Do I Fix It?

To fix the problem, you typically have three options:

  1. Don’t use SSL for the connection. But that’s probably not a good idea…
  2. Disable certification trust verification in your application framework. Another bad idea since it makes a man-in-the middle attack possible. But sometimes for quick testing and proof of concept this is acceptable. But NEVER do this in production!!!
  3. Verify, import and trust the certificate authority or individual certificate.

Of those options, let’s do it the right way and get our trust properly established.

Getting the certificate

The first step is getting the public certificate (or preferably the certificate authority for that certificate) that you want to trust. You don’t need the private key that goes with that certificate and no admin that knew what they were doing would give it to you anyway. There are a number of different ways to get this information depending on what type of access you have to the server that contains the SSL certificate.

Access To The Server

If you have direct access to the server, you can export the certificate to a file. To get started, follow these steps:

Export Certificate via Microsoft Management Console (mmc).
  1. On the server that has the certificate you want to export, start the Microsoft Management Console. Press Windows-R on your keyboard to bring up the “Run…” command line. Then enter ‘mmc’ and press enter.
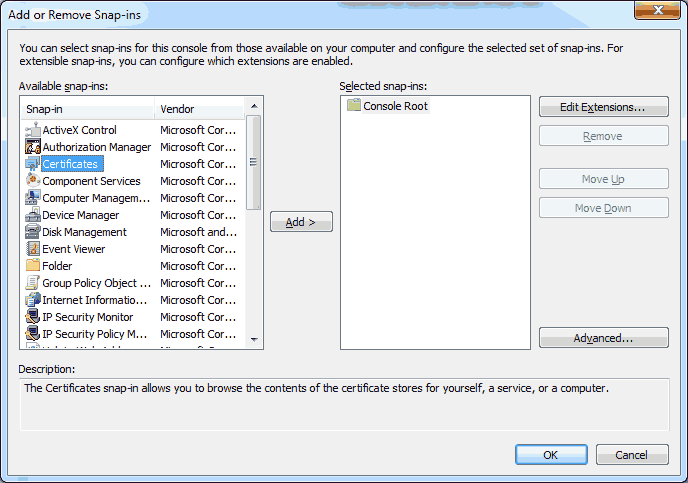
  2. File -> Add/Remove snap in…
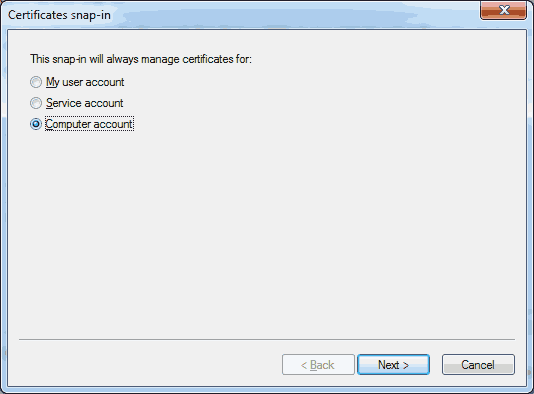
  3. windows-ssl-export-01Choose ‘Certificate’ from the list and click on the ‘Add >’ button.
  4. windows-ssl-export-02Choose ‘Computer Account’ and click on ‘Next >’.
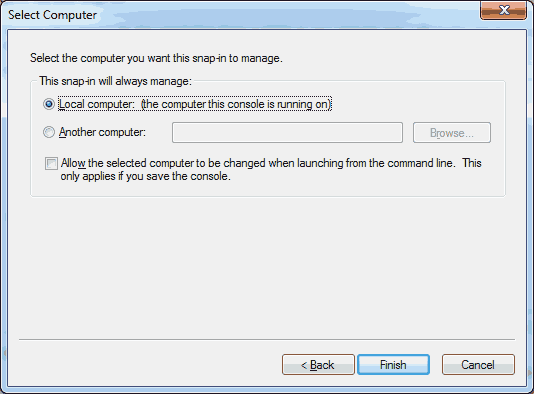
  5. windows-ssl-export-03Choose ‘Local computer: (the computer this console is running on)’. Click on ‘Finish’.
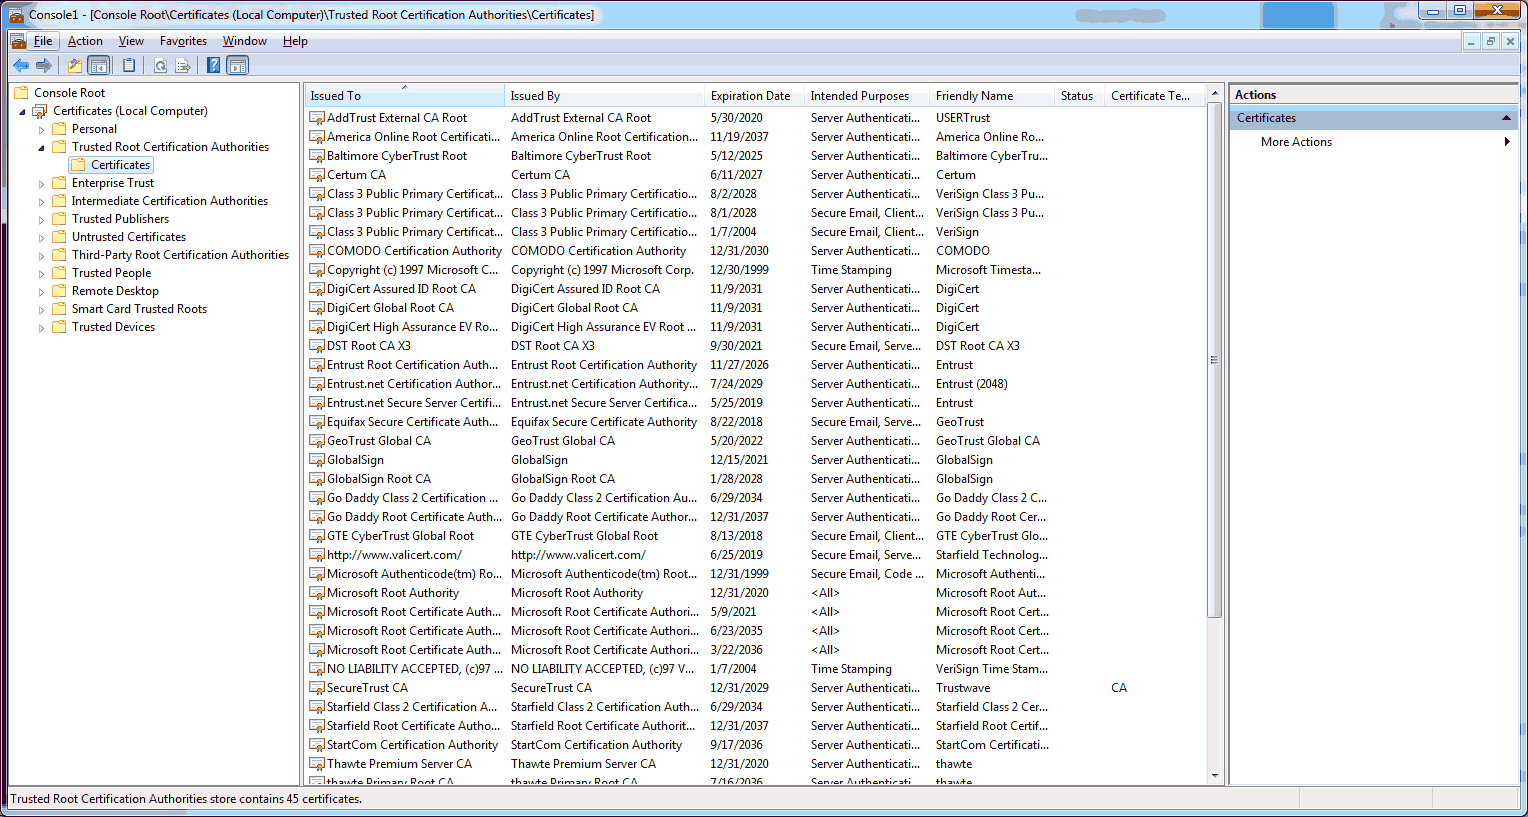
  6. Find the certificate in the list that you want to export. Most likely located in the ‘Personal > Certificates’ or ‘Trusted Root Certification Authorities > Certificates’ locations. Right click on the certificate you want to export, then choose ‘All Tasks’ -> ‘Export…’.
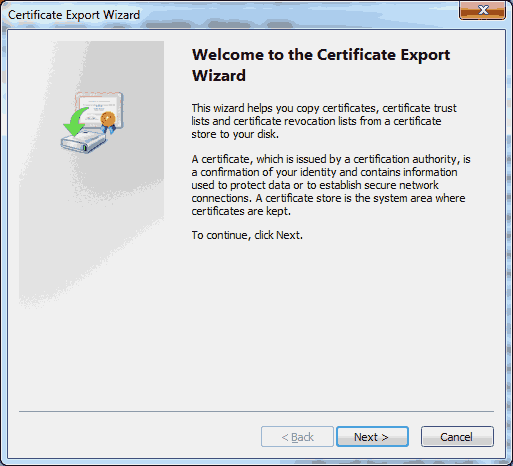
  7. windows-ssl-export-04This starts the Certificate Export Wizard. Click ‘Next >’.
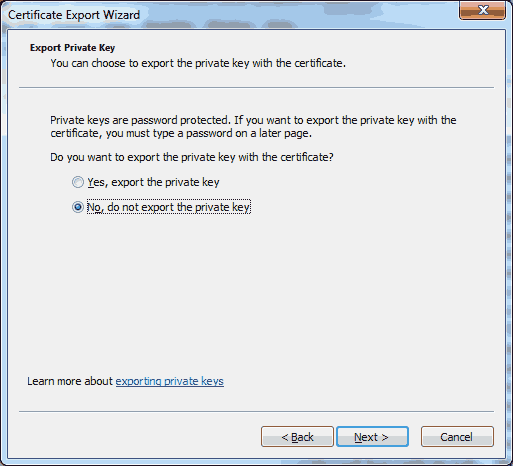
  8. windows-ssl-export-05If the certificate you have also had a corresponding private key, choose ‘No, do not export the private key’. As discussed previously, you do NOT want to export the private key or give it to anyone else. Click on ‘Next >’.
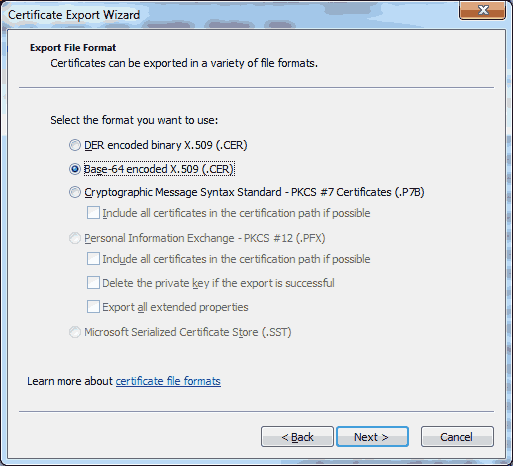
  9. windows-ssl-export-06Choose ‘Base-64 encoded X.509 (.CER)’ and click on ‘Next >’. Note: You could choose any of the other formats, depending on where you will be using the certificate. I personally find the Base-64 encoded certificate to be more compatible across platforms.
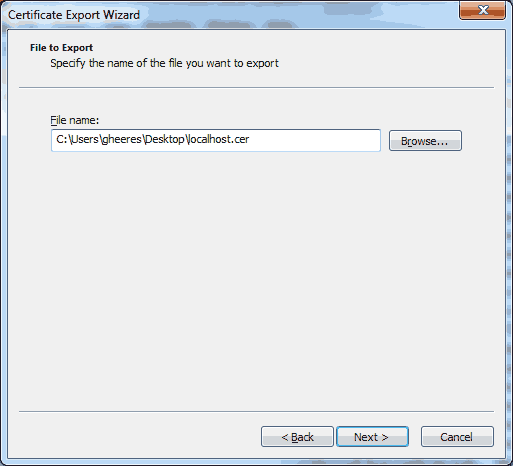
  10. windows-ssl-export-07Choose a location and filename to save the file to. Make sure it ends with either ‘*.cer’ or ‘*.crt’ so that the Windows operating system will recognize the type of file. Click on ‘Next >’.
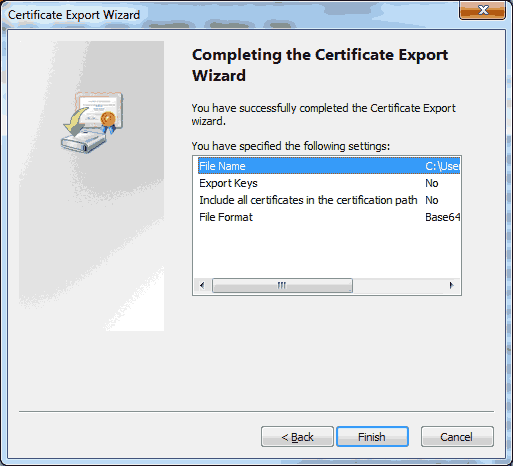
  11. windows-ssl-export-08Click on ‘Next >’.
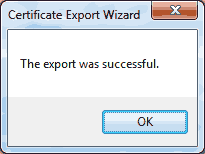
  12. windows-ssl-export-08You should receive a confirmation that the certificate was exported successfully. Click on ‘OK’.
No Access to the server

If you don’t have direct access to the server, you can still get the public certificate that is presented to you. If you’re trying to get a certificate for an HTTP/HTTPS server, you can easily view the certificate and save it to file. However, if you’re trying to get the SSL certificate from LDAPS or perhaps IMAPS, we’ll need to use the OpenSSL utilities to view the certificates. OpenSSL isn’t installed by default on Windows machines, however if you have access to a Linux server, typically the openssl tools will be available. For Windows, we can download the OpenSSL binaries or use Cygwin to install GNU / POSIX compatible binaries.

OpenSSL Tools

Once you have the openssl binaries available, we can use the following command to view the SSL certificates for any type of connection. The following example would view the certificates for an LDAPS (LDAP via SSL) connection on the default port. Please note that Active Directory and LDAP are basically the same. Active Directory is Microsoft’s implementation of LDAP.

openssl s_client -showcerts -host remoteserver.domain.name -port 636

Running that command, you should see something similar to the following:

CONNECTED(00000003)
---
Certificate chain
 0 s:/C=US/ST=California/L=Mountain View/O=Google Inc/CN=www.google.com
   i:/C=US/O=Google Inc/CN=Google Internet Authority G2
-----BEGIN CERTIFICATE-----
MIIEdjCCA16gAwIBAgIICNMg30SopiMwDQYJKoZIhvcNAQEFBQAwSTELMAkGA1UE
BhMCVVMxEzARBgNVBAoTCkdvb2dsZSBJbmMxJTAjBgNVBAMTHEdvb2dsZSBJbnRl
cm5ldCBBdXRob3JpdHkgRzIwHhcNMTQwNTIyMTEyNTU4WhcNMTQwODIwMDAwMDAw
WjBoMQswCQYDVQQGEwJVUzETMBEGA1UECAwKQ2FsaWZvcm5pYTEWMBQGA1UEBwwN
TW91bnRhaW4gVmlldzETMBEGA1UECgwKR29vZ2xlIEluYzEXMBUGA1UEAwwOd3d3
Lmdvb2dsZS5jb20wggEiMA0GCSqGSIb3DQEBAQUAA4IBDwAwggEKAoIBAQCNJSwk
PPpMgw/J/diF5cAqGbmNe/Bih1rLVsfBwJDS3zunxMI1IAhoudccuQd0h4OWYcGc
z1Y8aNvpPz+3qY0GUvQcVGLh8JydQJI8eBlXL9v8J/uK2GBT/37Bkcga94DqpOLG
9n5Fvsd6F87+jpuCyDXW1hv6aNr4uiyFwa7I3HlTSr6BauM+aS0PXUTJSBi0BG73
gJbpTB/MgFlILp3x5bYSpn+3eSdME4EKEq42uy/oVHFrXsgZA6/lmWMiM/Is530x
FJfu0Bz7OgPRYsAiGiGjhPyPUs4oTOQERq2j9cIM4OXHVtZqehESE6noDvlNhptA
R+6lpPoDgQp2O5BjAgMBAAGjggFBMIIBPTAdBgNVHSUEFjAUBggrBgEFBQcDAQYI
KwYBBQUHAwIwGQYDVR0RBBIwEIIOd3d3Lmdvb2dsZS5jb20waAYIKwYBBQUHAQEE
XDBaMCsGCCsGAQUFBzAChh9odHRwOi8vcGtpLmdvb2dsZS5jb20vR0lBRzIuY3J0
MCsGCCsGAQUFBzABhh9odHRwOi8vY2xpZW50czEuZ29vZ2xlLmNvbS9vY3NwMB0G
A1UdDgQWBBQAC/6CV31piwAaimR5f1OK/QdilTAMBgNVHRMBAf8EAjAAMB8GA1Ud
IwQYMBaAFErdBhYbvPZotXb1gba7Yhq6WoEvMBcGA1UdIAQQMA4wDAYKKwYBBAHW
eQIFATAwBgNVHR8EKTAnMCWgI6Ahhh9odHRwOi8vcGtpLmdvb2dsZS5jb20vR0lB
RzIuY3JsMA0GCSqGSIb3DQEBBQUAA4IBAQB3JODw4UTUX3xJyr55rbd5EIeMQjcs
sKRvH/oJmEcIl1hrOaiNnpEbQis+2N5YR2PMMU825iO30L66hIswPOxfFiBeb1ZM
TWPJG5WXx7fctFPDXbJ3Zjq3cANIaX8Vlu4nSayNEhKnNuZog1YVSrg3Mu3E+8Ln
bzt+pZa9iTH821hu/il3TmRzXndT3dEz+n1XkrT3F9NBL3ZyYceDU5uB9fo7x25H
pLP/8pxIqu3+AcoGqNmJpxSfWlaqKXqd3TZ++edHtgTO5t8KV65GgCQ9+Wl0amtG
odT0vGI0eRPRl6s+Nnk6Aguz4bkRPsYTuEVJdEd3F+f9kxHrVWI0c+J4
-----END CERTIFICATE-----
 1 s:/C=US/O=Google Inc/CN=Google Internet Authority G2
   i:/C=US/O=GeoTrust Inc./CN=GeoTrust Global CA
-----BEGIN CERTIFICATE-----
MIIEBDCCAuygAwIBAgIDAjppMA0GCSqGSIb3DQEBBQUAMEIxCzAJBgNVBAYTAlVT
MRYwFAYDVQQKEw1HZW9UcnVzdCBJbmMuMRswGQYDVQQDExJHZW9UcnVzdCBHbG9i
YWwgQ0EwHhcNMTMwNDA1MTUxNTU1WhcNMTUwNDA0MTUxNTU1WjBJMQswCQYDVQQG
EwJVUzETMBEGA1UEChMKR29vZ2xlIEluYzElMCMGA1UEAxMcR29vZ2xlIEludGVy
bmV0IEF1dGhvcml0eSBHMjCCASIwDQYJKoZIhvcNAQEBBQADggEPADCCAQoCggEB
AJwqBHdc2FCROgajguDYUEi8iT/xGXAaiEZ+4I/F8YnOIe5a/mENtzJEiaB0C1NP
VaTOgmKV7utZX8bhBYASxF6UP7xbSDj0U/ck5vuR6RXEz/RTDfRK/J9U3n2+oGtv
h8DQUB8oMANA2ghzUWx//zo8pzcGjr1LEQTrfSTe5vn8MXH7lNVg8y5Kr0LSy+rE
ahqyzFPdFUuLH8gZYR/Nnag+YyuENWllhMgZxUYi+FOVvuOAShDGKuy6lyARxzmZ
EASg8GF6lSWMTlJ14rbtCMoU/M4iarNOz0YDl5cDfsCx3nuvRTPPuj5xt970JSXC
DTWJnZ37DhF5iR43xa+OcmkCAwEAAaOB+zCB+DAfBgNVHSMEGDAWgBTAephojYn7
qwVkDBF9qn1luMrMTjAdBgNVHQ4EFgQUSt0GFhu89mi1dvWBtrtiGrpagS8wEgYD
VR0TAQH/BAgwBgEB/wIBADAOBgNVHQ8BAf8EBAMCAQYwOgYDVR0fBDMwMTAvoC2g
K4YpaHR0cDovL2NybC5nZW90cnVzdC5jb20vY3Jscy9ndGdsb2JhbC5jcmwwPQYI
KwYBBQUHAQEEMTAvMC0GCCsGAQUFBzABhiFodHRwOi8vZ3RnbG9iYWwtb2NzcC5n
ZW90cnVzdC5jb20wFwYDVR0gBBAwDjAMBgorBgEEAdZ5AgUBMA0GCSqGSIb3DQEB
BQUAA4IBAQA21waAESetKhSbOHezI6B1WLuxfoNCunLaHtiONgaX4PCVOzf9G0JY
/iLIa704XtE7JW4S615ndkZAkNoUyHgN7ZVm2o6Gb4ChulYylYbc3GrKBIxbf/a/
zG+FA1jDaFETzf3I93k9mTXwVqO94FntT0QJo544evZG0R0SnU++0ED8Vf4GXjza
HFa9llF7b1cq26KqltyMdMKVvvBulRP/F/A8rLIQjcxz++iPAsbw+zOzlTvjwsto
WHPbqCRiOwY1nQ2pM714A5AuTHhdUDqB1O6gyHA43LL5Z/qHQF1hwFGPa4NrzQU6
yuGnBXj8ytqU0CwIPX4WecigUCAkVDNx
-----END CERTIFICATE-----
 2 s:/C=US/O=GeoTrust Inc./CN=GeoTrust Global CA
   i:/C=US/O=Equifax/OU=Equifax Secure Certificate Authority
-----BEGIN CERTIFICATE-----
MIIDfTCCAuagAwIBAgIDErvmMA0GCSqGSIb3DQEBBQUAME4xCzAJBgNVBAYTAlVT
MRAwDgYDVQQKEwdFcXVpZmF4MS0wKwYDVQQLEyRFcXVpZmF4IFNlY3VyZSBDZXJ0
aWZpY2F0ZSBBdXRob3JpdHkwHhcNMDIwNTIxMDQwMDAwWhcNMTgwODIxMDQwMDAw
WjBCMQswCQYDVQQGEwJVUzEWMBQGA1UEChMNR2VvVHJ1c3QgSW5jLjEbMBkGA1UE
AxMSR2VvVHJ1c3QgR2xvYmFsIENBMIIBIjANBgkqhkiG9w0BAQEFAAOCAQ8AMIIB
CgKCAQEA2swYYzD99BcjGlZ+W988bDjkcbd4kdS8odhM+KhDtgPpTSEHCIjaWC9m
OSm9BXiLnTjoBbdqfnGk5sRgprDvgOSJKA+eJdbtg/OtppHHmMlCGDUUna2YRpIu
T8rxh0PBFpVXLVDviS2Aelet8u5fa9IAjbkU+BQVNdnARqN7csiRv8lVK83Qlz6c
JmTM386DGXHKTubU1XupGc1V3sjs0l44U+VcT4wt/lAjNvxm5suOpDkZALeVAjmR
Cw7+OC7RHQWa9k0+bw8HHa8sHo9gOeL6NlMTOdReJivbPagUvTLrGAMoUgRx5asz
PeE4uwc2hGKceeoWMPRfwCvocWvk+QIDAQABo4HwMIHtMB8GA1UdIwQYMBaAFEjm
aPkr0rKV10fYIyAQTzOYkJ/UMB0GA1UdDgQWBBTAephojYn7qwVkDBF9qn1luMrM
TjAPBgNVHRMBAf8EBTADAQH/MA4GA1UdDwEB/wQEAwIBBjA6BgNVHR8EMzAxMC+g
LaArhilodHRwOi8vY3JsLmdlb3RydXN0LmNvbS9jcmxzL3NlY3VyZWNhLmNybDBO
BgNVHSAERzBFMEMGBFUdIAAwOzA5BggrBgEFBQcCARYtaHR0cHM6Ly93d3cuZ2Vv
dHJ1c3QuY29tL3Jlc291cmNlcy9yZXBvc2l0b3J5MA0GCSqGSIb3DQEBBQUAA4GB
AHbhEm5OSxYShjAGsoEIz/AIx8dxfmbuwu3UOx//8PDITtZDOLC5MH0Y0FWDomrL
NhGc6Ehmo21/uBPUR/6LWlxz/K7ZGzIZOKuXNBSqltLroxwUCEm2u+WR74M26x1W
b8ravHNjkOR/ez4iyz0H7V84dJzjA1BOoa+Y7mHyhD8S
-----END CERTIFICATE-----
---
Server certificate
subject=/C=US/ST=California/L=Mountain View/O=Google Inc/CN=www.google.com
issuer=/C=US/O=Google Inc/CN=Google Internet Authority G2
---
No client certificate CA names sent
---
SSL handshake has read 3231 bytes and written 432 bytes
---
New, TLSv1/SSLv3, Cipher is RC4-SHA
Server public key is 2048 bit
Compression: NONE
Expansion: NONE
SSL-Session:
    Protocol  : TLSv1
    Cipher    : RC4-SHA
    Session-ID: D915A1902D9384B5E11F80BF76037C61048F24C763802E9C5CE9F56684F713B2
    Session-ID-ctx: 
    Master-Key: DB66D3BC903435A25D3C436D39E4ED2E513731ED7DF3F6BB6AA8C7245ED70433B61546CB0BA3F1465D8B87A978CB5715
    Key-Arg   : None
    Start Time: 1401542147
    Timeout   : 300 (sec)
    Verify return code: 20 (unable to get local issuer certificate)
---

Note: This example was run against a pubic Google WWW / HTTPS server.

In the example output above, we see a full certificate authority chain. Typically when working with SSL, you want to trust the certificate authority that signed the actual certificate. You could trust each certificate individually, however this doesn’t scale beyond a handful of servers.Each BEGIN CERTIFICATE and END CERTIFICATE block contains the base-64 encoded version of that SSL certificate. Once you find the certificate you want, copy the BEGIN / END block inclusively and save to a file with a *.crt or *.cer extension.

-----BEGIN CERTIFICATE-----
MIIEBDCCAuygAwIBAgIDAjppMA0GCSqGSIb3DQEBBQUAMEIxCzAJBgNVBAYTAlVT
MRYwFAYDVQQKEw1HZW9UcnVzdCBJbmMuMRswGQYDVQQDExJHZW9UcnVzdCBHbG9i
YWwgQ0EwHhcNMTMwNDA1MTUxNTU1WhcNMTUwNDA0MTUxNTU1WjBJMQswCQYDVQQG
EwJVUzETMBEGA1UEChMKR29vZ2xlIEluYzElMCMGA1UEAxMcR29vZ2xlIEludGVy
bmV0IEF1dGhvcml0eSBHMjCCASIwDQYJKoZIhvcNAQEBBQADggEPADCCAQoCggEB
AJwqBHdc2FCROgajguDYUEi8iT/xGXAaiEZ+4I/F8YnOIe5a/mENtzJEiaB0C1NP
VaTOgmKV7utZX8bhBYASxF6UP7xbSDj0U/ck5vuR6RXEz/RTDfRK/J9U3n2+oGtv
h8DQUB8oMANA2ghzUWx//zo8pzcGjr1LEQTrfSTe5vn8MXH7lNVg8y5Kr0LSy+rE
ahqyzFPdFUuLH8gZYR/Nnag+YyuENWllhMgZxUYi+FOVvuOAShDGKuy6lyARxzmZ
EASg8GF6lSWMTlJ14rbtCMoU/M4iarNOz0YDl5cDfsCx3nuvRTPPuj5xt970JSXC
DTWJnZ37DhF5iR43xa+OcmkCAwEAAaOB+zCB+DAfBgNVHSMEGDAWgBTAephojYn7
qwVkDBF9qn1luMrMTjAdBgNVHQ4EFgQUSt0GFhu89mi1dvWBtrtiGrpagS8wEgYD
VR0TAQH/BAgwBgEB/wIBADAOBgNVHQ8BAf8EBAMCAQYwOgYDVR0fBDMwMTAvoC2g
K4YpaHR0cDovL2NybC5nZW90cnVzdC5jb20vY3Jscy9ndGdsb2JhbC5jcmwwPQYI
KwYBBQUHAQEEMTAvMC0GCCsGAQUFBzABhiFodHRwOi8vZ3RnbG9iYWwtb2NzcC5n
ZW90cnVzdC5jb20wFwYDVR0gBBAwDjAMBgorBgEEAdZ5AgUBMA0GCSqGSIb3DQEB
BQUAA4IBAQA21waAESetKhSbOHezI6B1WLuxfoNCunLaHtiONgaX4PCVOzf9G0JY
/iLIa704XtE7JW4S615ndkZAkNoUyHgN7ZVm2o6Gb4ChulYylYbc3GrKBIxbf/a/
zG+FA1jDaFETzf3I93k9mTXwVqO94FntT0QJo544evZG0R0SnU++0ED8Vf4GXjza
HFa9llF7b1cq26KqltyMdMKVvvBulRP/F/A8rLIQjcxz++iPAsbw+zOzlTvjwsto
WHPbqCRiOwY1nQ2pM714A5AuTHhdUDqB1O6gyHA43LL5Z/qHQF1hwFGPa4NrzQU6
yuGnBXj8ytqU0CwIPX4WecigUCAkVDNx
-----END CERTIFICATE-----

You now have the public certificate of the remote server or certificate authority. Our next step will be to import that certificate into our Trusted Root Certificate Authorities.

Trusting / Importing a Certificate

Once you have your certificate, we can go ahead and import that certificate and trust it. Follow these steps:

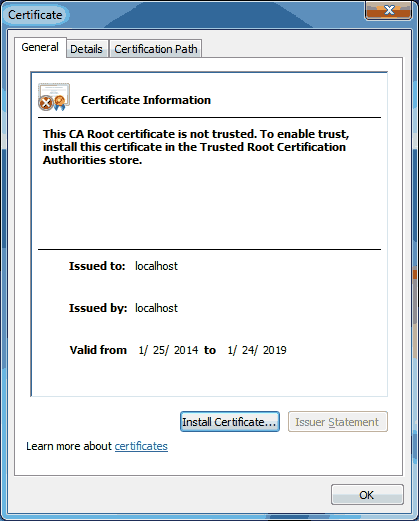
  1. windows-ssl-import-01 In Windows, double click or open the certificate that you extracted earlier. Click on the ‘Install Certificate…’ button.
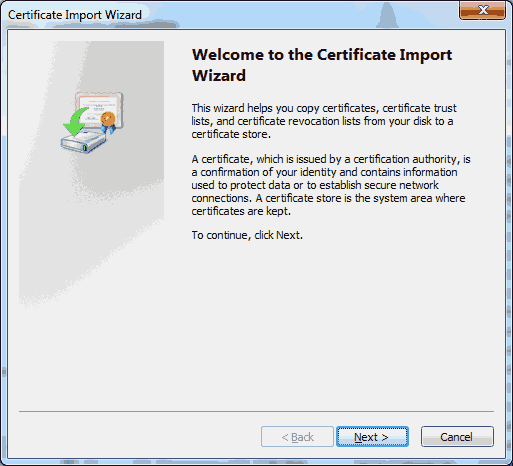
  2. windows-ssl-import-02 In the Certificate Import Wizard, click on ‘Next >’.
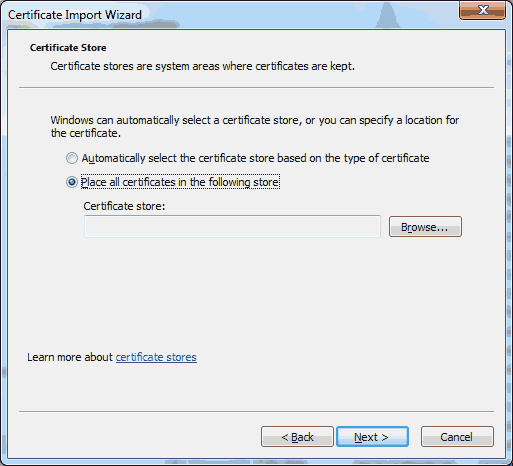
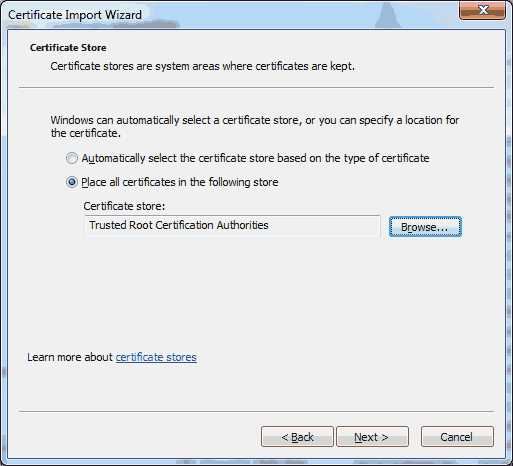
  3. windows-ssl-import-03 Choose ‘Place all certificates in the following store’. Then click on the ‘Browse…’ button.
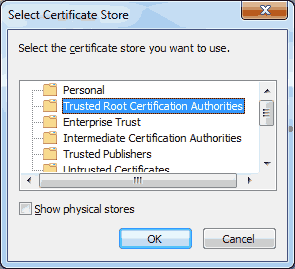
  4. windows-ssl-import-04 Click on the ‘Trusted Root Certificate Authorities’ and then click on the ‘OK’ button.
  5. windows-ssl-import-05 Click on ‘Next >’.
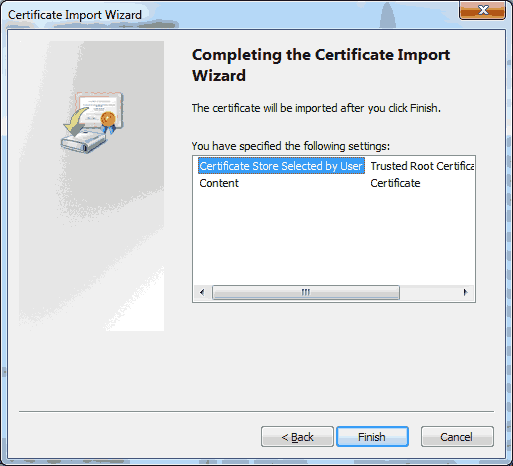
  6. windows-ssl-import-06 Click on ‘Finish’.
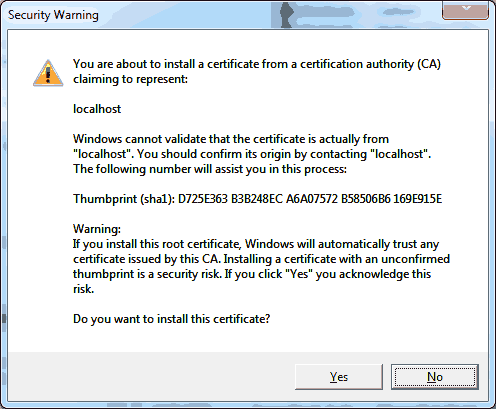
  7. windows-ssl-import-07 Depending on the certificate, you may receive the following warning. Basically this is warning you to make sure that you have the right certificate. Click on ‘Yes’ to continue.
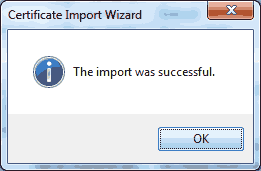
  8. windows-ssl-import-08 Click on ‘OK’.

The certificate should now be installed and trusted on your local computer.

Note, the above steps would import the certificate for your account. To add it for the computer (and all users), you would need to use the Microsoft Management Console (MMC). And use the ‘All Tasks -> Import…’ option.

Hopefully this has helped. Please note, that if you’re using a Java application or doing application development with Java, it’s trusted keystore information is stored separately from the operating system and is managed through the ‘keytool’ utility. We’ll save that topic for another day…

If you’ve just deployed a .svc file to a server (or your local IIS server) and you get an error that it doesn’t recognize the .svc mime type (or the type was blocked), they you need to do the following:

  1. Ensure that the .NET 3.5.1 Framework is installed.
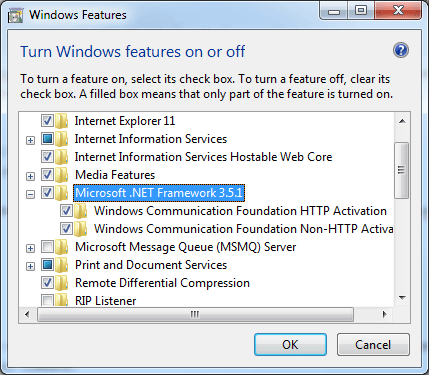
  2. Ensure that “Windows Communication Foundation HTTP Activation is enabled and installed. This can be access via the Program Features in the Control panel under “Turn Windows Features on or off”.
    Enable WCF HTTP Activation.

    Ensure that Windows Communication Foundation HTTP Activation is installed.

  3. Execute the following command with elevated privileges (as administrator):
    "%WINDIR%\Microsoft.Net\Framework\v3.0\Windows Communication Foundation\ServiceModelReg.exe" -i
         

    When you run the WCF service model registration, your machine web.config file will be updated. Below is output from the above command:

    Microsoft(R) Windows Communication Foundation Installation Utility
    [Microsoft (R) Windows (R) Communication Foundation, Version 3.0.4506.5420]
    Copyright (c) Microsoft Corporation.  All rights reserved.
    
    Installing: Machine.config Section Groups and Handlers (WOW64)
    Installing: Machine.config Section Groups and Handlers
    Installing: System.Web Build Provider (WOW64)
    Installing: System.Web Compilation Assemblies (WOW64)
    Installing: HTTP Handlers (WOW64)
    Installing: HTTP Modules (WOW64)
    Installing: System.Web Build Provider
    Installing: System.Web Compilation Assemblies
    Installing: HTTP Handlers
    Installing: HTTP Modules
    Installing: Protocol node for protocol net.tcp (WOW64)
    Installing: TransportConfiguration node for protocol net.tcp (WOW64)
    Installing: ListenerAdapter node for protocol net.tcp
    Installing: Protocol node for protocol net.tcp
    Installing: TransportConfiguration node for protocol net.tcp
    Installing: Protocol node for protocol net.pipe (WOW64)
    Installing: TransportConfiguration node for protocol net.pipe (WOW64)
    Installing: ListenerAdapter node for protocol net.pipe
    Installing: Protocol node for protocol net.pipe
    Installing: TransportConfiguration node for protocol net.pipe
    Installing: Protocol node for protocol net.msmq (WOW64)
    Installing: TransportConfiguration node for protocol net.msmq (WOW64)
    Installing: ListenerAdapter node for protocol net.msmq
    Installing: Protocol node for protocol net.msmq
    Installing: TransportConfiguration node for protocol net.msmq
    Installing: Protocol node for protocol msmq.formatname (WOW64)
    Installing: TransportConfiguration node for protocol msmq.formatname (WOW64)
    Installing: ListenerAdapter node for protocol msmq.formatname
    Installing: Protocol node for protocol msmq.formatname
    Installing: TransportConfiguration node for protocol msmq.formatname
    Installing: HTTP Modules (WAS)
    Installing: HTTP Handlers (WAS)
    

In the process of working through this problem, I first attempt to add the WCF HTTP Activation, which unfortunately corrupted my machine web.config file which prevented access to the IIS manager and associated application pools due to the error:

The configuration section 'system.serviceModel' cannot be read because it is missing a section declaration  

It broke everything .NET related… GREAT!!!

Basically, for some reason my machine web.config was missing the configuration section DLL registrations for the WCF serviceModel. By using the ServiceModelReg.exe tool, it ensured that those base registrations were entered correctly. Once that was updated, the add new features option was able to complete successfully.

If after those changes, you are receiving the following error:

Could not load type ‘System.ServiceModel.Activation.HttpModule’ from assembly ‘System.ServiceModel, Version=3.0.0.0, Culture=neutral, PublicKeyToken=b77a5c561934e089

This error can occur when there are multiple versions of the .NET Framework on the computer that is running IIS, and IIS was installed after .NET Framework 4.0 or before the Service Model in Windows Communication Foundation was registered. [MSDN]

To fix this error, start a command prompt as an administrator. And run the following commands:

cd %WINDIR%\Microsoft.NET\Framework64\v4.0.30319
aspnet_regiis.exe -iru
iisreset

On my ActiveDirectory (AD) node.js plugin, a user requested support for LDAP referrals and chasing (#8). Unfortunately, I didn’t have access to a partitioned AD installation to test this.

The user wasn’t very helpful with giving me additional information or test scenarios to work with it so I took it upon myself to install a partitioned AD environment… as well as some heavy reading about how Microsoft implemented their referrals and partitioning. I probably still don’t understand it…

The one interesting thing is that by default they create two application partitions, one for DNS entries (Forest & Domain) and one for configuration which allows for these areas to be replicated. Those example referrals look like the following, although replace domain.com with your context.

  • ldap://ForestDnsZones.domain.com/dc=domain,dc=com
  • ldap://DomainDnsZones.domain.com/dc=domain,dc=com
  • ldap://dc.domain.com/CN=Configuration,dc=domain,dc=com

With referral chasing, you end up basically sending a request to each of the referrals with the same original query in order to get “everything”. So that one LDAP query can quickly lead to an “N+1” select problem, overhead on the network and slower responses. To get around the problem, I just created a couple of regular expressions to exclude and ignore those referrals.

var defaultReferrals = {
  enabled: false,
  // Active directory returns the following partitions as default referrals which we don't want to follow
  exclude: [
    'ldaps?://ForestDnsZones\\..*/.*',
    'ldaps?://DomainDnsZones\\..*/.*',
    'ldaps?://.*/CN=Configuration,.*'
  ]
};

The other way around this problem is to use the Global Catalog (GC) instead of direct LDAP queries. Essentially the GC just listens on a different port (3268) but any LDAP search requests will be for the entire “forest”.